The Mardi Himal Trek is a short to moderate trekking route in the Annapurna region of Nepal, reaching up to 4,500 meters at Mardi Himal Base Camp. It typically starts from Pokhara and is known for its ridge-line trail, close-up views of Machhapuchhre, and flexible itineraries ranging from 3 to 8 days.
What You’ll Find in the Mardi Himal Trek Guide:
- Complete overview of the Mardi Himal Trek in the Annapurna Conservation Area, Kaski district, Gandaki Province, Nepal
- Why Mardi Himal is a trending, beginner-friendly trek with views of Mt. Machhapuchhre (Fishtail), Mardi Himal, Annapurna South, Hiunchuli, and the entire Annapurna range
- All starting points: Kande, Pittam Deurali, Kalimati, Sidhing, Pothana, and Dhampus, with transport details from Pokhara and Kathmandu
- Six itineraries from 3 days to 8 days with full route breakdowns, altitudes, distances, and difficulty levels
- Honest difficulty analysis based on 8 factors, including altitude, terrain, season, and fitness
- Best time for the Mardi Himal Trek, with all six Nepali seasons compared based on real trail conditions
- Permits required: ACAP explained, TIMS myth busted, and checkpoint details
- Food and water options on the trail, including what to eat and what to avoid
- Network, charging, and internet availability by camp
- Full accommodation list from Pittam Deurali to High Camp, with what to expect
- Complete packing checklist, including personal mistakes from a December trek
- Independent vs guided trekking, and which option makes more sense for you
- Mardi Himal Trek packages and cost for Nepalese and foreign trekkers
- Travel insurance and safety tips from personal experience on the trail
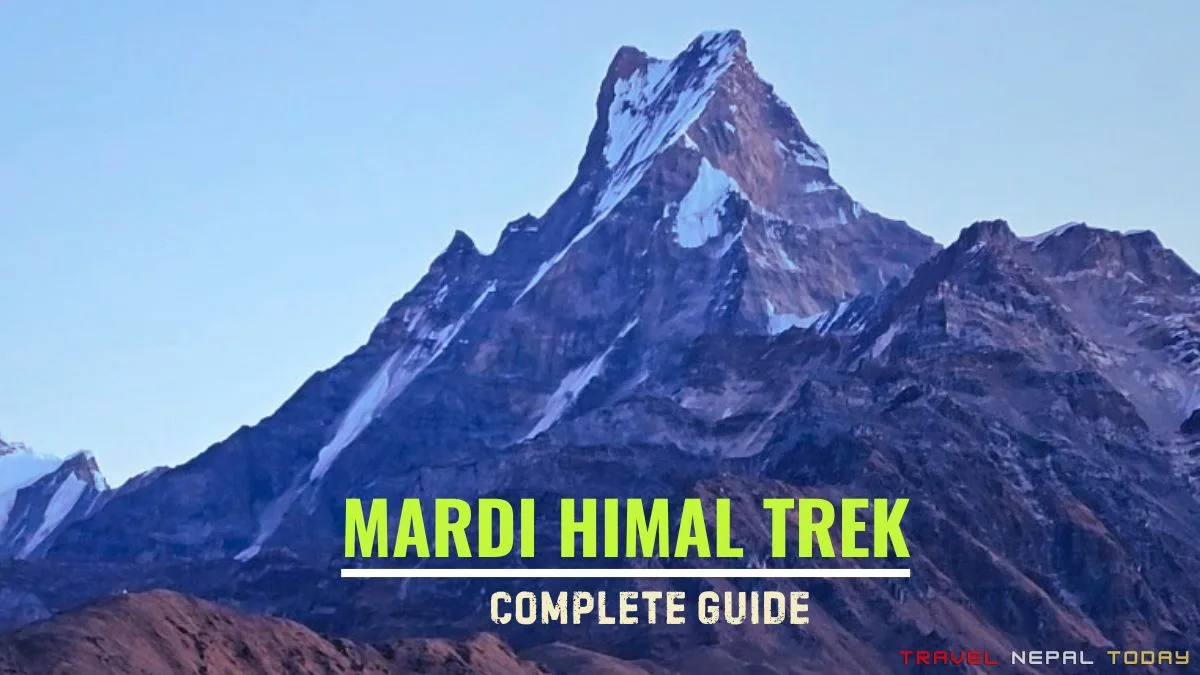
Kaski district is home to some of the most beautiful destinations in Nepal. And right now, if there’s one trek that has truly taken off among both locals and foreigners, it’s the Mardi Himal Trek!.
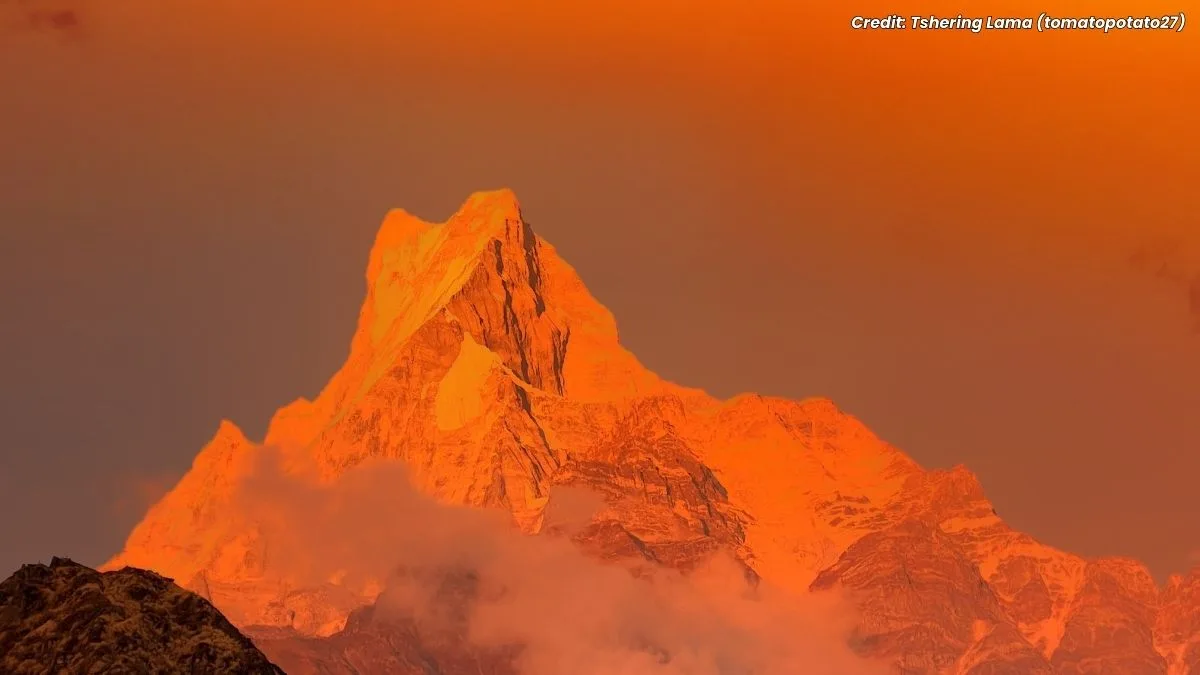
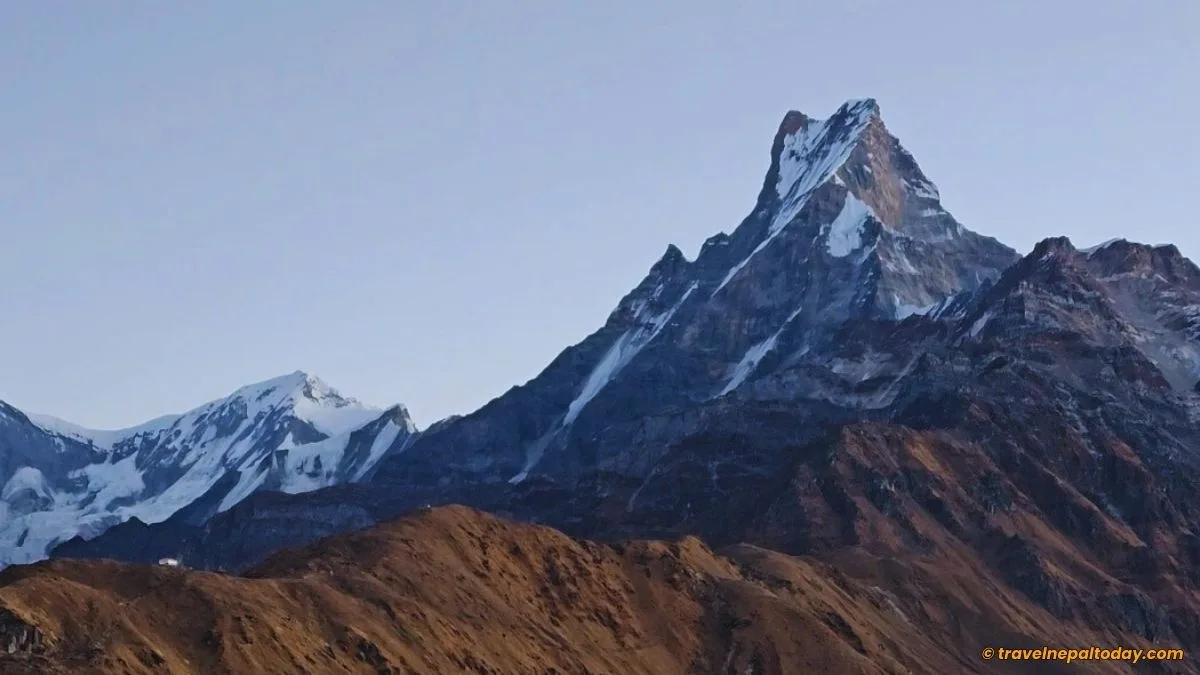
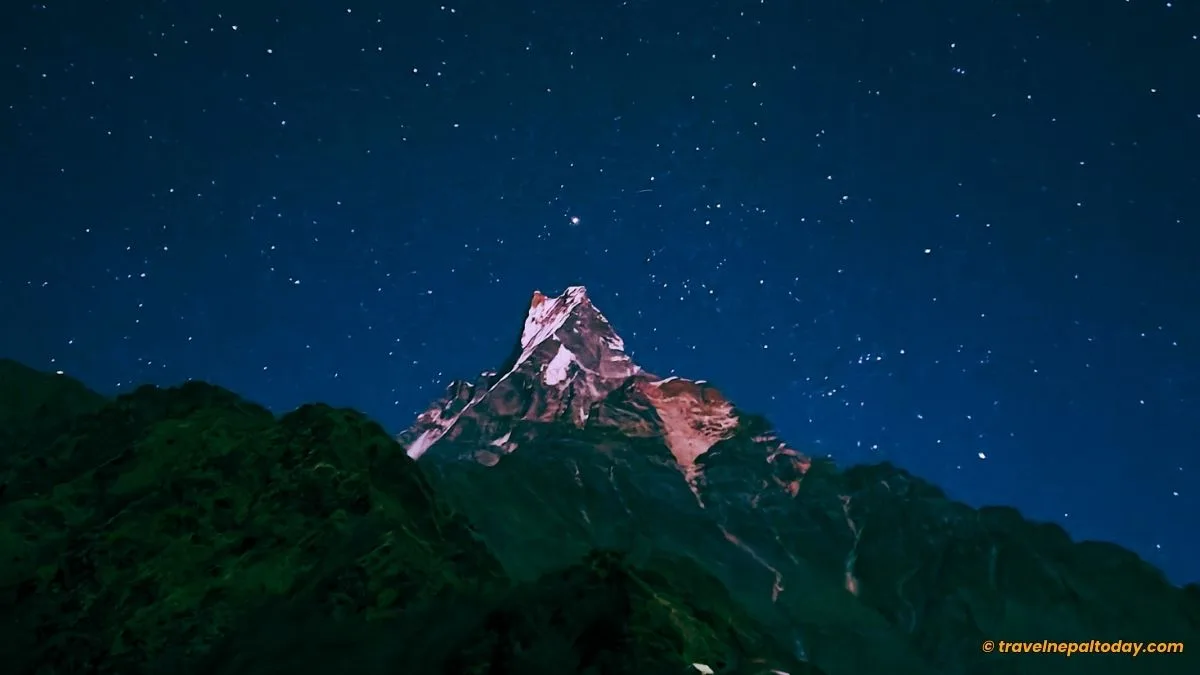
It’s short. It’s accessible. It rewards you with jaw-dropping views of Mt. Machhapuchhre (Fishtail at 6,993 m), and it’s the kind of adventure that fits into a tight schedule without feeling rushed.
That’s probably why it now makes it to the bucket list of almost every serious trekker visiting the Annapurna region.
I personally completed the Mardi Himal Trek in just 3 days from Pokhara, which was 5 days counting from Kathmandu. I skipped the traditional Kande starting point and went directly to Pittam Deurali on a shared passenger van from Pokhara to Dhampus, followed by a private jeep.
Was it fast? Yes. Did I still love it? Absolutely.
But for a fuller experience, one that lets you actually breathe the mountains in rather than rush through them, I still suggest giving it proper time. 5 to 6 days is the sweet spot. You can also go up to 7 or even 8 days if you want to soak everything in.
This guide covers every single thing you need before hitting the Mardi trail: transportation, itineraries, difficulty, best time, permits, food, accommodation, packing, and cost. Everything is based on what I’ve personally experienced and researched. So stick with me until the end!
Key Facts About Mardi Himal Trek
Here’s a quick overview of the key facts for the Mardi Himal Trek:
| Protected Area | Annapurna Conservation Area |
| Province | Gandaki |
| District | Kaski |
| Local Bodies | Annapurna Rural Municipality and Machhapuchhre Rural Municipality |
| Max. Altitude | 4,500 m (Mardi Himal Base Camp) |
| Highest Sleeping Altitude | 3,553 m (High Camp) |
| Trek Duration | 3 to 8 days |
| Trek Difficulty | Moderate |
| Accommodation Type | Mountain Lodge |
| Network Availability | Up to Low Camp |
| Charging Availability | Solar charge (up to High Camp) |
| Peak Season | October, November, March, and April |
| Best Time | October to May |
| Permits Required | Annapurna Conservation Area Permit (ACAP) |
| Main Ethnic Group | Gurung |
Why Choose Mardi Himal Trek?
There are plenty of treks in Nepal, and the question is fair: why Mardi Himal specifically? Here’s the honest answer.
- Short and accessible: You can complete this trek in as little as 3 days from Pokhara or 5 days from Kathmandu. No months of preparation, no complicated logistics.
- Beginner-friendly: The trail is rated Moderate, and on a 6 or 7-day plan, the daily elevation gain stays well within a manageable range. Even people with zero trekking experience have made it to the Mardi Viewpoint.
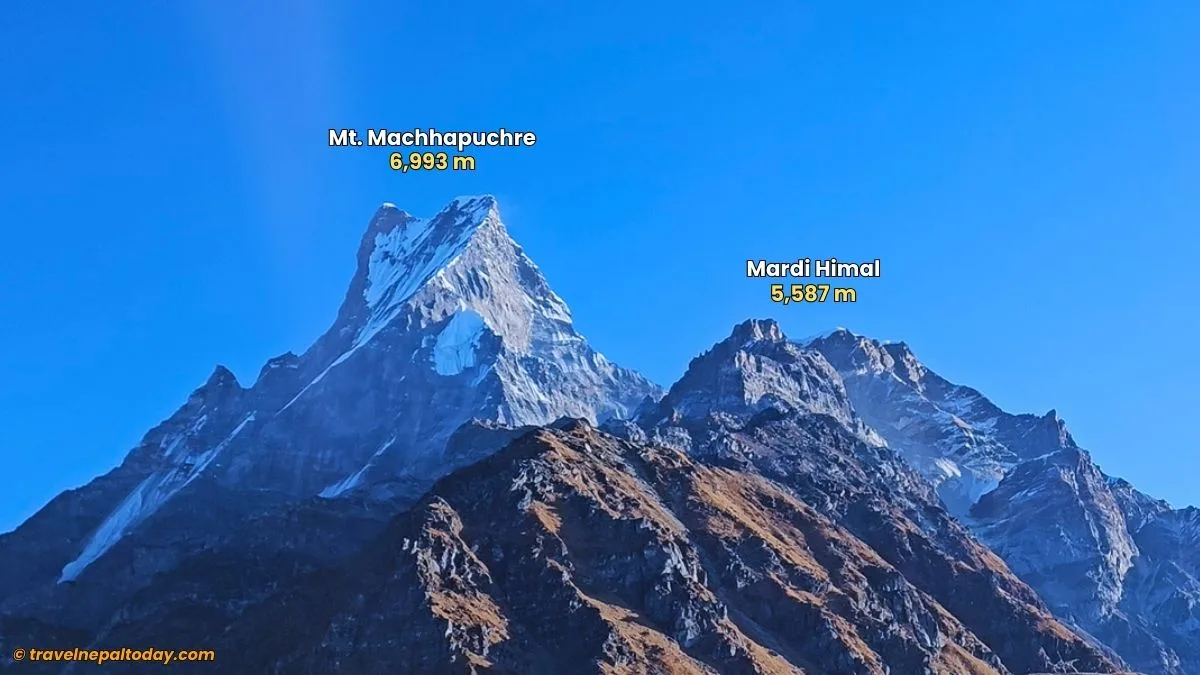
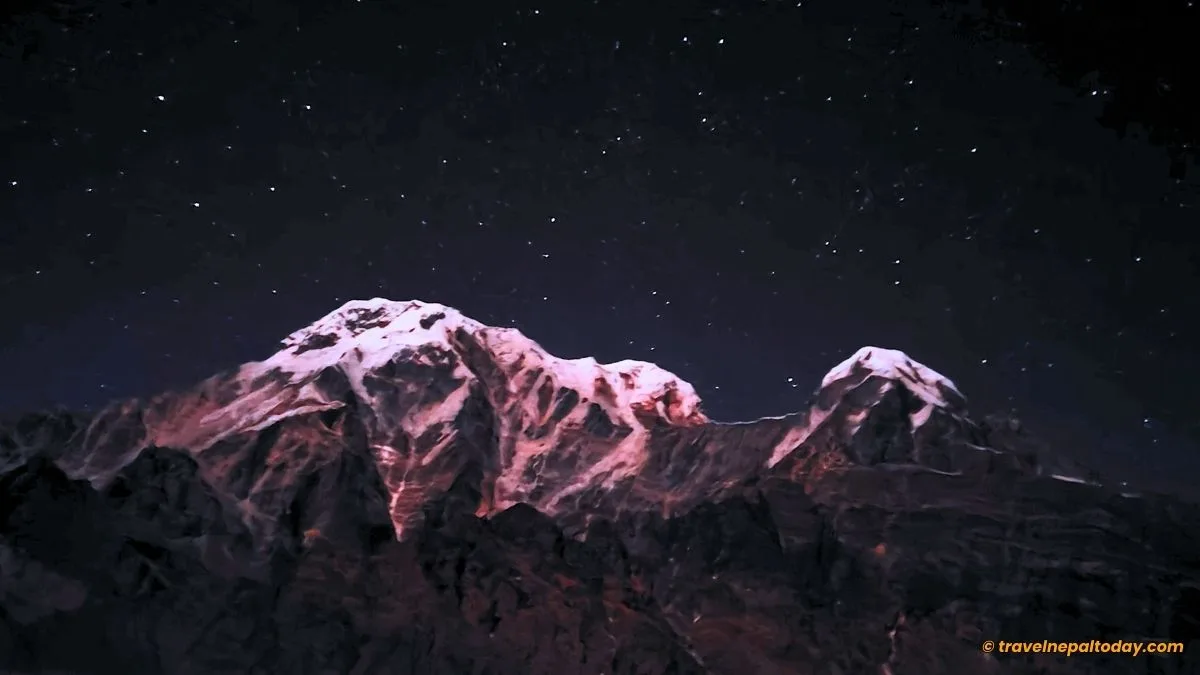
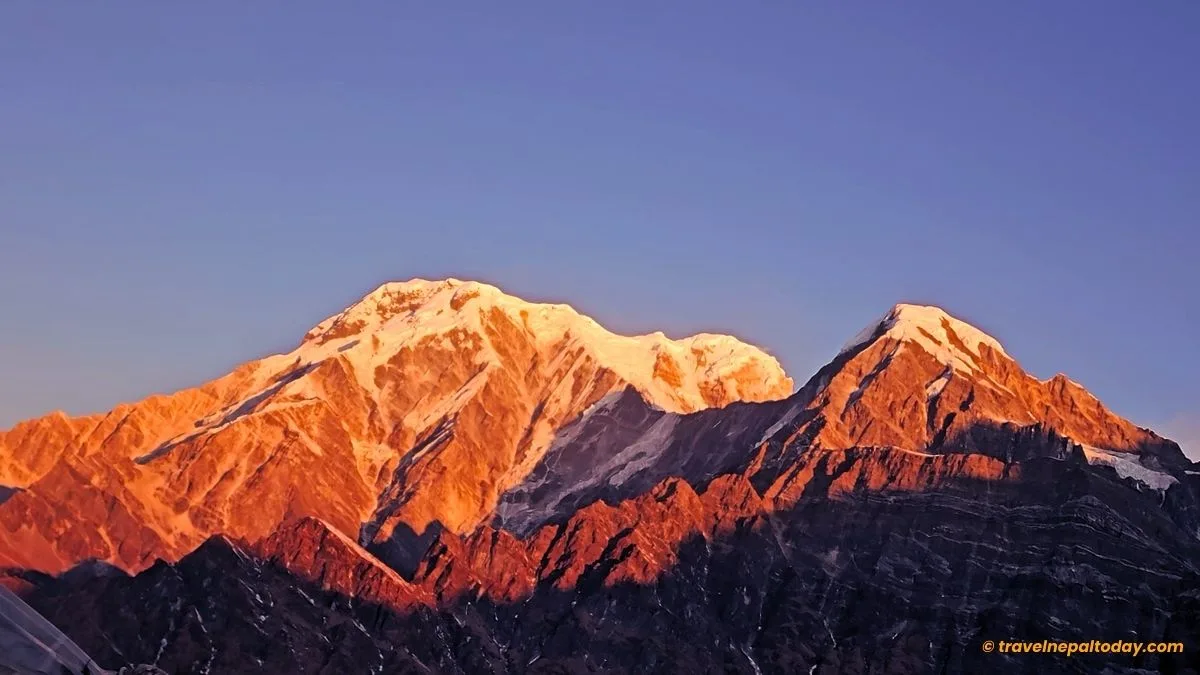
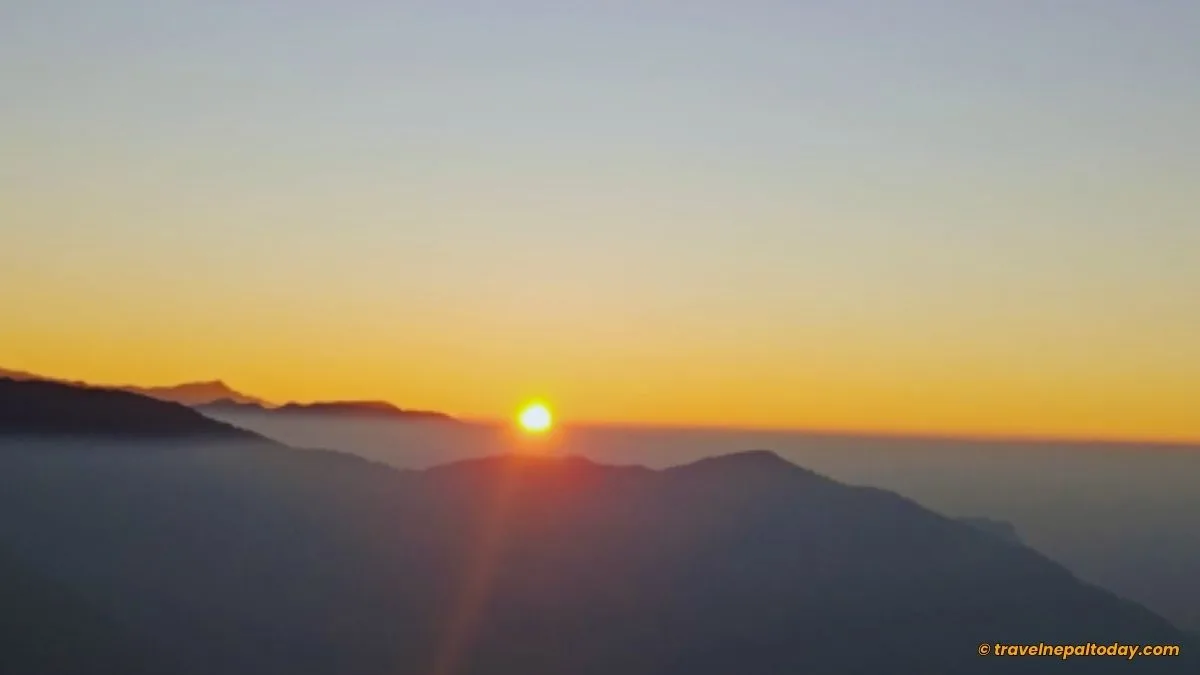
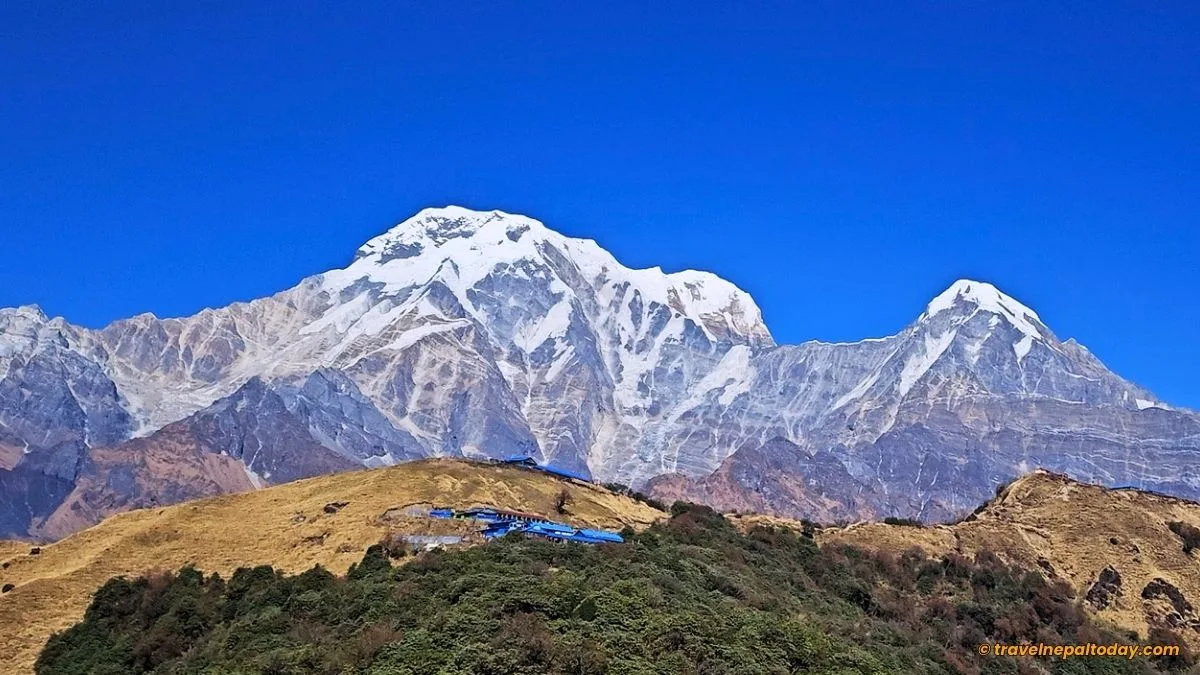
- Great mountain views: Machhapuchhre (Fishtail), Mardi Himal (5,587 m), Annapurna South (7,219 m), and Hiunchuli (6,441 m) are the stars. On a clear morning from High Camp, these peaks feel impossibly close. That golden sunrise moment at the Viewpoint is the kind of thing you stop trying to describe after a while.
- Only one permit required. Unlike treks in restricted areas, Mardi Himal only needs an ACAP permit. No special clearances, no complicated paperwork.
- Budget-friendly. Nepalese trekkers can complete it for under NPR 10,000 on a tight budget. Even for international trekkers, it’s one of the more affordable options in the Annapurna region.
- Flexible itinerary. 3 days, 4 days, 5, 6, 7, 8 days: all viable! You design the trip around your time, not the other way around.
And beyond the practical stuff, the trail itself has real character. The lower sections take you through dense rhododendron and pine forests.
The Gurung communities along the route are genuinely warm. And unlike heavily commercialised routes, Mardi still feels personal.
When I did this trek in December 2024 with two friends, we started as a group of three and ended as eight by Rest Camp.
What I can say from my experience is that the people you meet on this trail become part of the story. That’s something you can’t plan for, but it keeps happening here!
Reaching the Mardi Himal Starting Point: Bus and Jeep Details
Before you set foot on the trail, you need to reach one of the starting points. And for that, the first thing you need to do is get to Pokhara.
Whether you’re flying in from Kathmandu or taking the highway, Pokhara is your base. From there, all the starting points for the Mardi Himal Trek are within 30 km.
The main starting options are Kande, Pittam Deurali, Kalimati, Sidhing, Pothana, and Dhampus. Each has its own character, and the one you pick affects your total trekking days.
Pokhara to Pittam Deurali
This is the starting point I personally chose, and for good reason. It cuts out the lower forest walk significantly and lets you dive straight into the trail at a meaningful elevation.
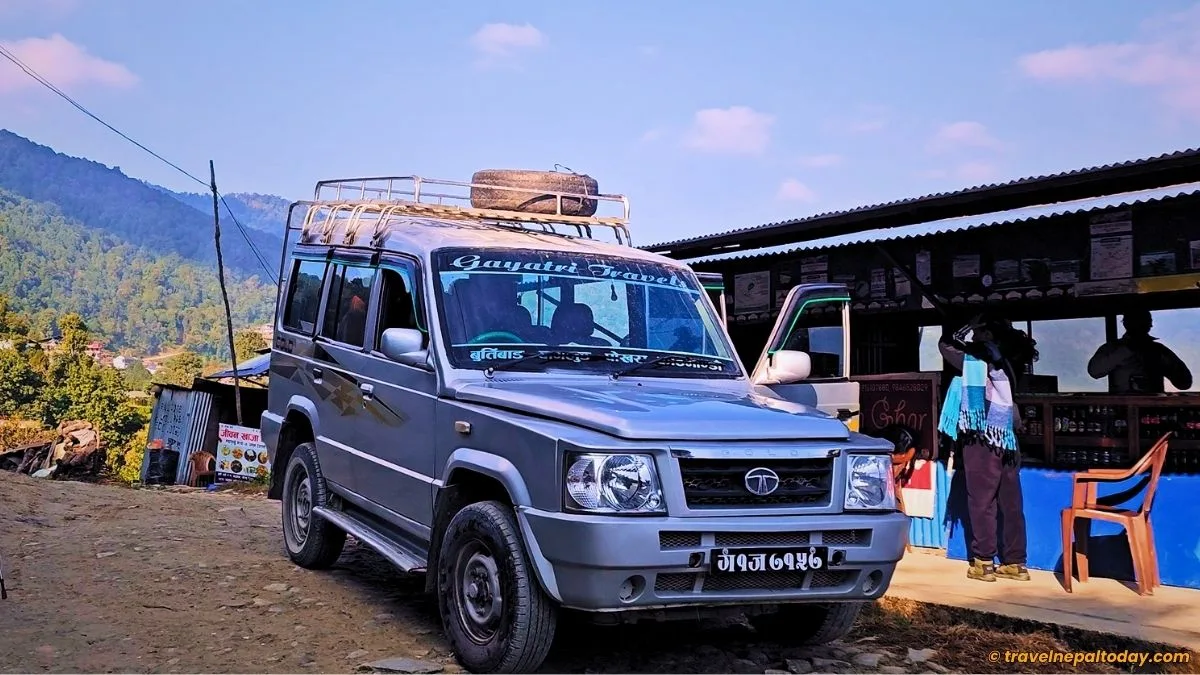
From Pokhara’s Hari Chowk, you can take a shared passenger van to Dhampus (around NPR 100 to 150 per person), then transfer to a private jeep up to Pittam Deurali (NPR 1,200 to 1,500 per person, negotiable). The total journey takes about 2 to 2.5 hours.
A direct Pittam Deurali bus from Hari Chowk also used to operate, but based on my own experience, the service is a little unreliable. The bus backed off on us without notice. So, I’d suggest not depending on it!
| Route | Pokhara > Ghatte Khola > Dhampus > Pothana > Pittam Deurali |
| Available From | Hari Chowk, Pokhara |
| Distance | 28 km |
| Duration | 2 to 2.5 hours |
| Expected Fare | NPR 1,500 (van + jeep) / NPR 400 (bus) |
| Road Condition | Blacktopped up to Ghatte Khola, gravelled up to Dhampus, earthen up to Pittam Deurali |
Pokhara to Kande (Most Popular)
Kande is the traditional and most popular starting point for the Mardi Himal Trek. It’s just 30 km from Pokhara and less than an hour away.
The advantage of starting from Kande is that you pass through Australian Camp, which is a lovely spot for lunch with solid mountain views. But compared to Pittam Deurali, it takes a bit more time to reach the main forest sections.
| Route | Pokhara > Dhikur Pokhari > Paudurkot > Kande |
| Available From | Hari Chowk, Pokhara |
| Distance | 30 km |
| Duration | 1 hour |
| Expected Fare | NPR 100 (bus) / NPR 1,000 to 1,200 (taxi) |
Kathmandu to Kande Direct Bus
If you’re coming straight from Kathmandu, there’s a night bus option that drops you at Kande directly. It’s one of the more convenient options if you want to save an extra day.
The bus goes toward Kusma, Beni, or Baglung via the Pokhara-Baglung Highway. Just board any of those services from Gongabu Bus Park or Kalanki and ask to get off at Kande.
| Route | Kathmandu > Pokhara > Kande |
| Available From | Gongabu Bus Park / Kalanki |
| Distance | 230 km |
| Duration | 7 to 8 hours |
| Expected Fare | NPR 900 to 1,500 |
Pokhara to Kalimati
This is the option most people don’t know about, but it’s one of the most efficient. A reserved jeep from Baglung Bus Park can take you all the way to Kalimati (1,833 m), cutting down your trekking time significantly.
From Kalimati, Forest Camp is just 2 to 3 hours away. Expert trekkers can even push to High Camp on the same day, though I wouldn’t recommend that for altitude reasons.
| Route | Pokhara > Milan Chowk > Lumre > Kalimati |
| Available From | Baglung Bus Park |
| Distance | 31 km |
| Duration | 2 hours |
| Expected Fare | NPR 5,000 to 7,000 (reserved jeep) |
| Note | Jeeps only run in dry seasons |
Returning from the Trek
For the return, the best exit point is Sidhing village. Jeeps are available here until dark, but during peak season, it’s smart to pre-book your jeep in advance.
On my own trek, we were a group of eight and barely managed to secure a jeep before it got too late.
Those taking the Sidhing-to-Kande route can find shared vehicles more easily on the return.
Best Mardi Himal Trek Itineraries: Route, Map, Distance, and Altitude
Depending on how much time you can allocate and what kind of experience you want, Mardi Himal Trek can be completed anywhere from 3 to 8 days.
The actual trekking days are 2 to 4, but the total count includes your travel days from Kathmandu or Pokhara.
Here’s a full breakdown of every itinerary, with complete day-by-day details so you can choose what fits you best.
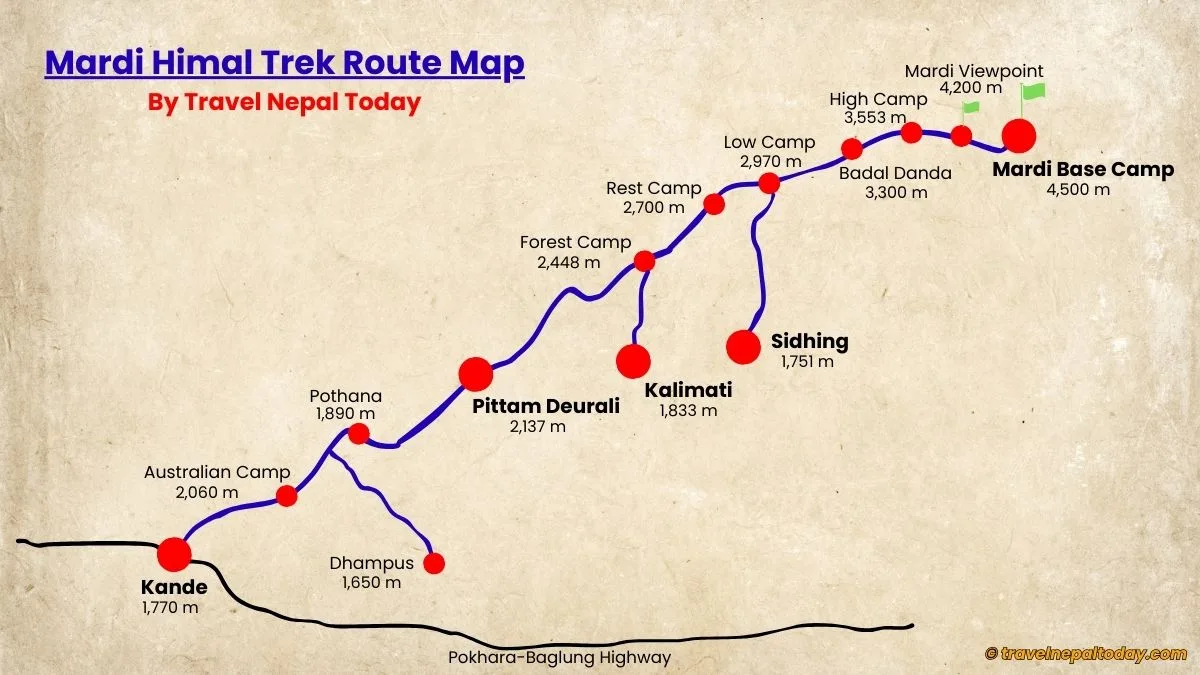
Mardi Himal Trek Route: Kande > Australian Camp > Pothana > Pittam Deurali > Forest Camp > Rest Camp > Low Camp > Badal Danda > High Camp > Mardi Viewpoint > Mardi Base Camp > Low Camp > Sidhing
Mardi Himal Trek Distance Breakdown:
- Kande to Goldanda: 1 km, 30 minutes
- Goldanda to Australian Camp: 1 km, 45 minutes
- Australian Camp to Pothana: 1.5 km, 30 minutes
- Dhampus to Pothana: 4 km, 1.5 hours
- Pothana to Pittam Deurali: 2 km, 45 minutes
- Pittam Deurali to Dhod Kharka: 5 km, 2 hours
- Dhod Kharka to Besal Bari: 1 km, 45 minutes
- Besal Bari to Forest Camp: 1.5 km, 30 minutes
- Kalimati to Forest Camp: 4 km, 2 hours
- Forest Camp to Rest Camp: 1 km, 1 hour
- Rest Camp to Kamkiku: 1 km, 1 hour
- Kamkiku to Low Camp: 1.5 km, 1 hour
- Low Camp to Mid Camp: 1 km, 1 hour
- Mid Camp to Badal Danda: 500 meters, 30 minutes
- Badal Danda to Upper Badal Danda (or Low High Camp): 500 meters, 30 minutes
- Upper Badal Danda to High Camp: 2.5 km, 1.5 hours
- High Camp to Lower Viewpoint: 2.5 km, 2.5 hours
- Lower Viewpoint to Mardi Himal Viewpoint (Upper Viewpoint): 1.5 km, 1 hour
- Mardi Himal Viewpoint to Mardi Himal Lower Base Camp: 700 meters, 30 minutes
- Mardi Himal Lower Base Camp to Mardi Himal West Base Camp (Mardi Base Camp): 1 km, 1.5 hours
- Low Camp to Sidhing: 5 km, 3 hours
Itinerary 1: 3-Day Trek From Pokhara (Shortest)
The fastest version of the Mardi Himal Trek. It’s completely doable, but Day 3 is genuinely long. If you choose this itinerary, start early every single day and don’t linger.
Day 1: Pokhara to Pittam Deurali Drive, Reach Rest Camp
| Start Point | Pittam Deurali (2,137 m) |
| End Point | Rest Camp (2,700 m) |
| Drive Distance | 28 km |
| Drive Duration | 2 to 2.5 hours |
| Hike Distance | 9 km |
| Hike Duration | 5 to 6 hours |
| Elevation Gain | 1,778 m |
| Route | Hari Chowk (922 m) > Pittam Deurali (2,137 m) > Suire Danda (2,440 m) > Dhod Kharka (2,559 m) > Besal Baari (2,572 m) > Forest Camp / Kokar (2,448 m) > Rest Camp (2,700 m) |
| Difficulty | Easy |
Day 2: Rest Camp to High Camp
| Start Point | Rest Camp (2,700 m) |
| End Point | High Camp (3,553 m) |
| Hike Distance | 6.5 km |
| Hike Duration | 6 to 7 hours |
| Elevation Gain | 853 m |
| Route | Rest Camp (2,700 m) > Kamkiku (2,793 m) > Low Camp (2,970 m) > Mid Camp (3,209 m) > Badal Danda (3,300 m) > Upper Badal Danda (3,357 m) > High Camp (3,553 m) |
| Difficulty | Moderate |
Day 3: High Camp to Base Camp, Descend to Sidhing, Drive to Pokhara
| Start Point | High Camp (3,553 m) |
| End Point | Sidhing (1,751 m) |
| Hike Distance | 21 km |
| Hike Duration | 11 to 12 hours (excluding breaks) |
| Elevation Gain | 947 m |
| Route | High Camp (3,553 m) > Lower Viewpoint (3,981 m) > Mardi Himal Viewpoint (4,200 m) > Lower Base Camp (4,218 m) > Mardi Himal West Base Camp (4,500 m) > High Camp > Low Camp > Takaichi (2,285 m) > Ratencho (2,092 m) > Bhimjung (1,935 m) > Sidhing (1,751 m) |
| Drive Distance | 31 km |
| Drive Duration | 2 to 2.5 hours |
| Difficulty | Moderate to Difficult |
Itinerary 2: 4-Day Trek From Pokhara (Most Ideal)
If you’re already in Pokhara, this is the itinerary I’d recommend to almost everyone. The extra day compared to the 3-day plan gives you a proper rest night at Low Camp during the descent, which means you’re not racing down 21 km in a single push on Day 3.
Day 1: Pokhara to Pittam Deurali Drive, Reach Rest Camp
| Start Point | Pittam Deurali (2,137 m) |
| End Point | Rest Camp (2,700 m) |
| Drive Distance | 28 km |
| Drive Duration | 2 to 2.5 hours |
| Hike Distance | 9 km |
| Hike Duration | 5 to 6 hours |
| Elevation Gain | 1,778 m |
| Route | Hari Chowk (922 m) > Pittam Deurali (2,137 m) > Suire Danda (2,440 m) > Dhod Kharka (2,559 m) > Besal Baari (2,572 m) > Forest Camp / Kokar (2,448 m) > Rest Camp (2,700 m) |
| Difficulty | Easy |
Day 2: Rest Camp to High Camp
| Start Point | Rest Camp (2,700 m) |
| End Point | High Camp (3,553 m) |
| Hike Distance | 6.5 km |
| Hike Duration | 6 to 7 hours |
| Elevation Gain | 853 m |
| Route | Rest Camp (2,700 m) > Kamkiku (2,793 m) > Low Camp (2,970 m) > Mid Camp (3,209 m) > Badal Danda (3,300 m) > Upper Badal Danda (3,357 m) > High Camp (3,553 m) |
| Difficulty | Moderate |
Day 3: Viewpoint and Base Camp Exploration, Return to Low Camp
| Start Point | High Camp (3,553 m) |
| End Point | Low Camp (2,970 m) |
| Hike Distance | 16 km |
| Hike Duration | 7 to 8 hours |
| Elevation Gain | 947 m |
| Route | High Camp (3,553 m) > Lower Viewpoint (3,981 m) > Mardi Himal Viewpoint (4,200 m) > Lower Base Camp (4,218 m) > Mardi Himal West Base Camp (4,500 m) > High Camp > Badal Danda (3,300 m) > Low Camp (2,970 m) |
| Difficulty | Intermediate |
Day 4: Low Camp to Sidhing, Drive to Pokhara
| Start Point | Low Camp (2,970 m) |
| End Point | Sidhing (1,751 m) |
| Hike Distance | 5 km |
| Hike Duration | 3 to 4 hours |
| Drive Distance | 31 km |
| Drive Duration | 2 to 2.5 hours |
| Difficulty | Easy |
Itinerary 3: 5-Day Trek From Kathmandu (Fast-Paced)
This is exactly the itinerary I followed. Day 1 is your Kathmandu to Pokhara travel day, and then the 3-day Pokhara trek runs from Day 2 to Day 4. Day 5 is your Pokhara to Kathmandu return.
It’s fast but perfectly manageable. Just don’t expect a relaxed pace on Day 4.
Day 1: Kathmandu to Pokhara
| Drive Distance | 200 km |
| Drive Duration | 6 to 7 hours |
| Options | Bus (day or night), passenger van, domestic flight |
Day 2: Pokhara to Pittam Deurali Drive, Reach Rest Camp
| Start Point | Pittam Deurali (2,137 m) |
| End Point | Rest Camp (2,700 m) |
| Drive Distance | 28 km |
| Drive Duration | 2 to 2.5 hours |
| Hike Distance | 9 km |
| Hike Duration | 5 to 6 hours |
| Elevation Gain | 1,778 m |
| Route | Hari Chowk (922 m) > Pittam Deurali (2,137 m) > Suire Danda (2,440 m) > Dhod Kharka (2,559 m) > Besal Baari (2,572 m) > Forest Camp / Kokar (2,448 m) > Rest Camp (2,700 m) |
| Difficulty | Easy |
Day 3: Rest Camp to High Camp
| Start Point | Rest Camp (2,700 m) |
| End Point | High Camp (3,553 m) |
| Hike Distance | 6.5 km |
| Hike Duration | 6 to 7 hours |
| Elevation Gain | 853 m |
| Route | Rest Camp (2,700 m) > Kamkiku (2,793 m) > Low Camp (2,970 m) > Mid Camp (3,209 m) > Badal Danda (3,300 m) > Upper Badal Danda (3,357 m) > High Camp (3,553 m) |
| Difficulty | Moderate |
Day 4: High Camp to Base Camp, Descend to Sidhing, Drive to Pokhara
| Start Point | High Camp (3,553 m) |
| End Point | Sidhing (1,751 m) |
| Hike Distance | 21 km |
| Hike Duration | 11 to 12 hours (excluding breaks) |
| Route | High Camp (3,553 m) > Lower Viewpoint (3,981 m) > Mardi Himal Viewpoint (4,200 m) > Lower Base Camp (4,218 m) > Mardi Himal West Base Camp (4,500 m) > High Camp > Low Camp > Takaichi (2,285 m) > Ratencho (2,092 m) > Bhimjung (1,935 m) > Sidhing (1,751 m) |
| Drive Distance | 31 km |
| Drive Duration | 2 to 2.5 hours |
| Difficulty | Moderate to Difficult |
Day 5: Pokhara to Kathmandu
| Drive Distance | 200 km |
| Drive Duration | 6 to 7 hours |
| Options | Bus, passenger van, domestic flight |
Itinerary 4: 6-Day Trek From Kathmandu (Best Overall)
This is the one I recommend to most people. One extra day compared to the 5-day plan makes a real difference: you’re not cramming the long Day 3 descent into an already intense day.
Everything feels more natural at this pace, and you don’t finish the trek exhausted.
Day 1: Kathmandu to Pokhara
| Drive Distance | 200 km |
| Drive Duration | 6 to 7 hours |
| Options | Bus (day or night), passenger van, domestic flight |
Day 2: Pokhara to Pittam Deurali Drive, Reach Rest Camp
| Start Point | Pittam Deurali (2,137 m) |
| End Point | Rest Camp (2,700 m) |
| Drive Distance | 28 km |
| Drive Duration | 2 to 2.5 hours |
| Hike Distance | 9 km |
| Hike Duration | 5 to 6 hours |
| Elevation Gain | 1,778 m |
| Route | Hari Chowk (922 m) > Pittam Deurali (2,137 m) > Suire Danda (2,440 m) > Dhod Kharka (2,559 m) > Besal Baari (2,572 m) > Forest Camp / Kokar (2,448 m) > Rest Camp (2,700 m) |
| Difficulty | Easy |
Day 3: Rest Camp to High Camp
| Start Point | Rest Camp (2,700 m) |
| End Point | High Camp (3,553 m) |
| Hike Distance | 6.5 km |
| Hike Duration | 6 to 7 hours |
| Elevation Gain | 853 m |
| Route | Rest Camp (2,700 m) > Kamkiku (2,793 m) > Low Camp (2,970 m) > Mid Camp (3,209 m) > Badal Danda (3,300 m) > Upper Badal Danda (3,357 m) > High Camp (3,553 m) |
| Difficulty | Moderate |
Day 4: Viewpoint and Base Camp Exploration, Return to Low Camp
| Start Point | High Camp (3,553 m) |
| End Point | Low Camp (2,970 m) |
| Hike Distance | 16 km |
| Hike Duration | 7 to 8 hours |
| Elevation Gain | 947 m |
| Route | High Camp (3,553 m) > Lower Viewpoint (3,981 m) > Mardi Himal Viewpoint (4,200 m) > Lower Base Camp (4,218 m) > Mardi Himal West Base Camp (4,500 m) > High Camp > Badal Danda (3,300 m) > Low Camp (2,970 m) |
| Difficulty | Intermediate |
Day 5: Low Camp to Sidhing, Drive to Pokhara
| Start Point | Low Camp (2,970 m) |
| End Point | Sidhing (1,751 m) |
| Hike Distance | 5 km |
| Hike Duration | 3 to 4 hours |
| Drive Distance | 31 km |
| Drive Duration | 2 to 2.5 hours |
| Difficulty | Easy |
Day 6: Pokhara to Kathmandu
| Drive Distance | 200 km |
| Drive Duration | 6 to 7 hours |
| Options | Bus, passenger van, domestic flight |
Itinerary 5: 7-Day Trek From Kathmandu (Slow and Scenic)
The 7-day itinerary adds the classic Kande starting point and Australian Camp to the picture. This is the OG Mardi Himal route that most trekking agencies follow, and it gives you proper time in the lower cultural sections before pushing for altitude.
Day 1: Kathmandu to Pokhara
| Drive Distance | 200 km |
| Drive Duration | 6 to 7 hours |
| Options | Bus, passenger van, domestic flight |
Day 2: Pokhara to Kande Drive, Hike to Pittam Deurali
| Start Point | Kande (1,770 m) |
| End Point | Pittam Deurali (2,137 m) |
| Drive Distance | 30 km |
| Drive Duration | 1 hour |
| Hike Distance | 5.5 km |
| Hike Duration | 3 to 4 hours |
| Elevation Gain | 1,337 m |
| Route | Kande (1,770 m) > Australian Camp (2,060 m) > Pothana (1,890 m) > Pittam Deurali (2,137 m) |
| Difficulty | Easy |
Day 3: Pittam Deurali to Rest Camp
| Start Point | Pittam Deurali (2,137 m) |
| End Point | Rest Camp (2,700 m) |
| Hike Distance | 9 km |
| Hike Duration | 5 to 6 hours |
| Elevation Gain | 563 m |
| Route | Pittam Deurali (2,137 m) > Suire Danda (2,440 m) > Dhod Kharka (2,559 m) > Besal Baari (2,572 m) > Forest Camp / Kokar (2,448 m) > Rest Camp (2,700 m) |
| Difficulty | Easy |
Day 4: Rest Camp to High Camp
| Start Point | Rest Camp (2,700 m) |
| End Point | High Camp (3,553 m) |
| Hike Distance | 6.5 km |
| Hike Duration | 6 to 7 hours |
| Elevation Gain | 853 m |
| Route | Rest Camp (2,700 m) > Kamkiku (2,793 m) > Low Camp (2,970 m) > Mid Camp (3,209 m) > Badal Danda (3,300 m) > Upper Badal Danda (3,357 m) > High Camp (3,553 m) |
| Difficulty | Moderate |
Day 5: Viewpoint and Base Camp Exploration, Return to Low Camp
| Start Point | High Camp (3,553 m) |
| End Point | Low Camp (2,970 m) |
| Hike Distance | 16 km |
| Hike Duration | 7 to 8 hours |
| Elevation Gain | 947 m |
| Route | High Camp (3,553 m) > Lower Viewpoint (3,981 m) > Mardi Himal Viewpoint (4,200 m) > Lower Base Camp (4,218 m) > Mardi Himal West Base Camp (4,500 m) > High Camp > Badal Danda (3,300 m) > Low Camp (2,970 m) |
| Difficulty | Intermediate |
Day 6: Low Camp to Sidhing, Drive to Pokhara
| Start Point | Low Camp (2,970 m) |
| End Point | Sidhing (1,751 m) |
| Hike Distance | 5 km |
| Hike Duration | 3 to 4 hours |
| Drive Distance | 31 km |
| Drive Duration | 2 to 2.5 hours |
| Difficulty | Easy |
Day 7: Pokhara to Kathmandu
| Drive Distance | 200 km |
| Drive Duration | 6 to 7 hours |
| Options | Bus, passenger van, domestic flight |
Itinerary 6: 8-Day Trek From Kathmandu (The Longest, Best for First-Timers)
This is the most complete version of the Mardi Himal experience. It includes a dedicated day in Dhampus village, which is one of the most culturally rich Gurung settlements in the entire Annapurna region.
If this is your first time in Nepal and you want a proper immersive trip, the 8-day plan gives you exactly that.
Day 1: Kathmandu to Pokhara
| Drive Distance | 200 km |
| Drive Duration | 6 to 7 hours |
| Options | Bus, passenger van, domestic flight |
Day 2: Pokhara to Dhampus, Explore the Village
| Start Point | Pokhara (822 m) |
| End Point | Dhampus (1,650 m) |
| Drive Distance | 25 km |
| Drive Duration | 1.5 hours |
| Elevation Gain | 828 m |
Day 3: Dhampus to Pittam Deurali via Australian Camp
| Start Point | Dhampus (1,650 m) |
| End Point | Pittam Deurali (2,137 m) |
| Hike Distance | 7 km |
| Hike Duration | 3 to 4 hours |
| Elevation Gain | 487 m |
| Route | Dhampus (1,650 m) > Australian Camp (2,060 m) > Pothana (1,890 m) > Pittam Deurali (2,137 m) |
| Difficulty | Easy |
Day 4: Pittam Deurali to Rest Camp
| Start Point | Pittam Deurali (2,137 m) |
| End Point | Rest Camp (2,700 m) |
| Hike Distance | 9 km |
| Hike Duration | 5 to 6 hours |
| Elevation Gain | 563 m |
| Route | Pittam Deurali (2,137 m) > Suire Danda (2,440 m) > Dhod Kharka (2,559 m) > Besal Baari (2,572 m) > Forest Camp / Kokar (2,448 m) > Rest Camp (2,700 m) |
| Difficulty | Easy |
Day 5: Rest Camp to High Camp
| Start Point | Rest Camp (2,700 m) |
| End Point | High Camp (3,553 m) |
| Hike Distance | 6.5 km |
| Hike Duration | 6 to 7 hours |
| Elevation Gain | 853 m |
| Route | Rest Camp (2,700 m) > Kamkiku (2,793 m) > Low Camp (2,970 m) > Mid Camp (3,209 m) > Badal Danda (3,300 m) > Upper Badal Danda (3,357 m) > High Camp (3,553 m) |
| Difficulty | Moderate |
Day 6: Viewpoint and Base Camp Exploration, Return to Low Camp
| Start Point | High Camp (3,553 m) |
| End Point | Low Camp (2,970 m) |
| Hike Distance | 16 km |
| Hike Duration | 7 to 8 hours |
| Elevation Gain | 947 m |
| Route | High Camp (3,553 m) > Lower Viewpoint (3,981 m) > Mardi Himal Viewpoint (4,200 m) > Lower Base Camp (4,218 m) > Mardi Himal West Base Camp (4,500 m) > High Camp > Badal Danda (3,300 m) > Low Camp (2,970 m) |
| Difficulty | Intermediate |
Day 7: Low Camp to Sidhing, Drive to Pokhara
| Start Point | Low Camp (2,970 m) |
| End Point | Sidhing (1,751 m) |
| Hike Distance | 5 km |
| Hike Duration | 3 to 4 hours |
| Drive Distance | 31 km |
| Drive Duration | 2 to 2.5 hours |
| Difficulty | Easy |
Day 8: Pokhara to Kathmandu
| Drive Distance | 200 km |
| Drive Duration | 6 to 7 hours |
| Options | Bus, passenger van, domestic flight |
How Hard is the Mardi Himal Trek? Difficulty Explained
The short answer is: Mardi Himal is a moderate trek. But what that actually means depends on a few important factors.
Officially, it’s rated as moderate, which is a step below the difficult-level treks like Manaslu Circuit or Everest Base Camp.
But calling something “moderate” doesn’t tell the whole story. Your actual experience will vary based on your fitness level, the itinerary you choose, the season (weather window), and even your group dynamics.
Let me break down the eight factors that define how hard Mardi Himal actually gets.
Trek Length, Itinerary, and Elevation Gain
The longer your itinerary, the easier the daily effort becomes. Spreading 4,500 m of cumulative elevation over 7 days feels very different from compressing it into 3 days.
If you’re doing the 3-day itinerary from Pokhara, Day 3 is genuinely tough: 21 km with close to 12 hours of hiking. On a 6 or 7-day plan, you never hit that kind of intensity in a single day.
For beginners, I always recommend a minimum of 5 days from Kathmandu. It reduces daily elevation gain to a comfortable range and gives your body time to acclimatize properly.
Route distance comparison based on starting and ending points:
- Pittam Deurali to Sidhing: 36 km
- Kalimati to Kalimati: 32 km
- Sidhing to Sidhing: 30 km
- Kande to Sidhing: 42 km
Maximum Altitude and Physical Challenge
The highest sleeping altitude on Mardi Himal Trek is High Camp at 3,553 m. You’ll push higher on summit day to Mardi Himal Base Camp at 4,500 m, but you won’t sleep there.
That said, AMS (Acute Mountain Sickness) symptoms can appear as low as 2,500 m, so proper acclimatization matters even here.
On my own trek, one of my team members, a beginner, turned back halfway to the viewpoint. Another stopped short of Base Camp. Both made the right call, not because the trek was impossible for them, but because your body tells you what it needs and you have to listen.
The trail is mostly gradual up to High Camp. It gets steep and rugged only in the final push to the viewpoint and Base Camp. Walking 6 to 7 hours a day with your backpack is the standard expectation on most days.
Season and Weather
Every season feels different on the Mardi trail.
The peak seasons of autumn (October to November) and spring (March to May) bring the most reliable conditions: clear skies, stable temperatures, and well-worn trails. But they also bring crowds, particularly at High Camp.
Off-season months come with their own rewards.
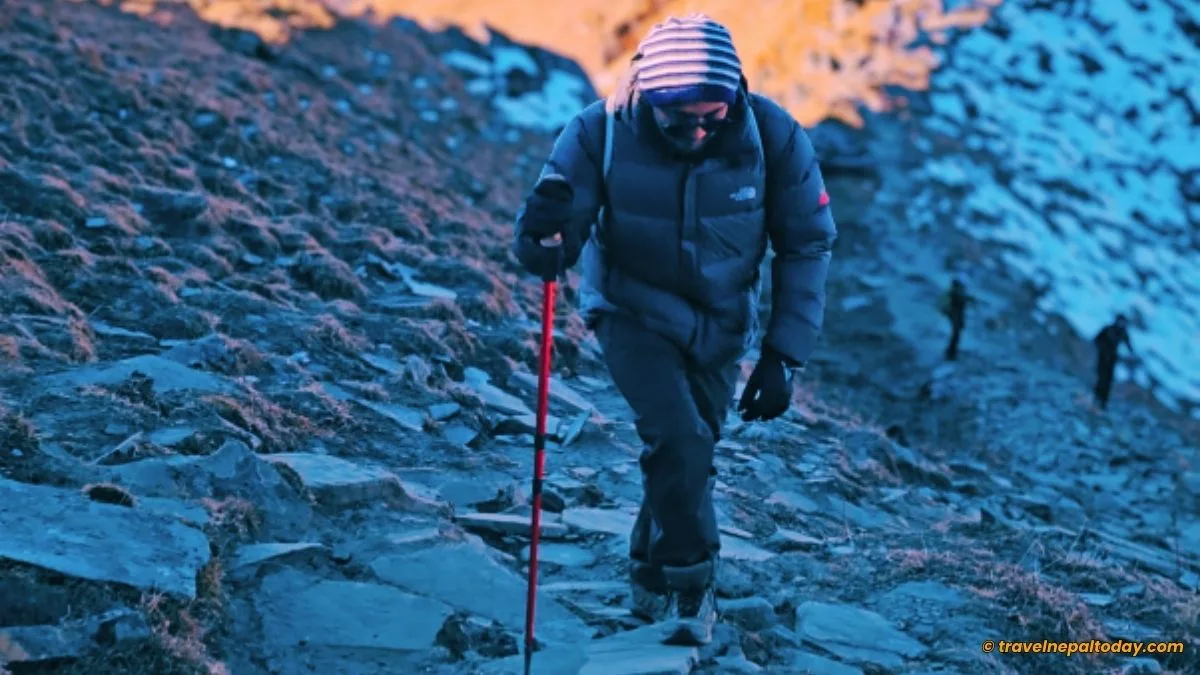
When I trekked in December 2024, mornings were cold and the water bucket was frozen every morning, but the skies were clear, the trail was quiet, and I got light snowfall on the last day. It was genuinely one of the better experiences I’ve had on any trek.
One thing to always keep in mind now is season creep. Seasons in Nepal are shifting.
Monsoon rainfall has been extending into October, spring is warmer earlier, and winters are shorter but colder. Always check recent trail conditions before you go rather than relying purely on a calendar.
Trail Type and Terrain
Lower sections up to Badal Danda are mostly forested paths with well-maintained stone stairs. It’s scenic, shaded, and manageable for almost anyone.
The trail becomes noticeably more rugged above High Camp. Snow and ice patches in winter and early spring require extra balance and attention.
But even then, the Mardi trail remains safe for beginners as long as you pace yourself and don’t rush.
Accommodation and Logistics
One logistical factor that can add to difficulty, especially during peak season, is accommodation availability at High Camp.
It fills up fast. Pre-booking your High Camp lodge is strongly advisable in October, November, March, and April.
Below High Camp, availability is generally not an issue even in peak months.
Road Access, Transport, and Emergency Support
Getting to and from the trail is relatively straightforward. Jeeps and buses reach Pittam Deurali, Sidhing, and Kande.
However, road conditions can change after heavy rainfall, and sometimes vehicles only reach Dhampus or Pothana.
For emergencies beyond basic first aid, helicopter evacuation is the only realistic option. This is why travel insurance is not just a suggestion but something I genuinely consider essential for this trek.
Personal Fitness and Group Dynamics
Basic fitness goes a long way here. You don’t need to be athletic, but being able to walk uphill for 5 to 7 hours with a backpack is the baseline requirement.
Group dynamics matter more than most people realize. Trekking with people who match your pace makes the experience smoother and more enjoyable.
During my own trek, I started solo but ended up in a group of eight by Rest Camp, and it completely changed the energy of the whole adventure!
If you’re doing this solo or with people you’ve just met, a local guide is worth every rupee. They know the trail, they understand altitude warning signs, and they will make genuinely better decisions under pressure than any app can.
Navigation and Minor Hazards
Board signs along the Mardi trail are generally good. You’re unlikely to get lost, all the way between Pittam Deurali and High Camp.
The only tricky sections are above High Camp, where trails can disappear under snow or where you need to read the terrain more carefully. This is where a guide becomes especially valuable in winter or post-snowfall conditions.
Best Time for Mardi Himal Trek: Seasons Compared
Every month is workable for the Mardi Himal Trek. Yes, I genuinely mean that. But the experience changes significantly depending on when you go.
Here’s an honest comparison across all six Nepali seasons:
Spring (Mid-March to May)
One of the two peak seasons.
Days are warm, rhododendrons bloom beautifully in the forest sections, and mountain views are consistently clear.
Crowds build from late March, and High Camp fills up fast. Best for first-timers who want the most predictable conditions.
Daytime temperatures: 10 to 20°C. Night temperatures at High Camp: 0 to 5°C.
Summer (Mid-May to July)
Often overlooked, but actually decent trekking conditions. Fewer people on the trail, pleasant temperatures at altitude, and some rain in lower forested sections from late June.
Leeches can appear after rainfall in the lower forests. Budget-friendly and quite peaceful.
Monsoon (Mid-July to September)
This is the season I’d personally skip if mountain views are your priority.
Trails get slippery and muddy, visibility is often poor, and landslides can affect road access.
The forests are lush and green, which does look beautiful, but the trade-off in views and trail safety is significant.
Autumn (October to Mid-November)
The classic trekking season in Nepal, and for good reason. Post-monsoon air is fresh, visibility is excellent, and temperatures are stable.
The downside is the crowd. October in particular is extremely busy, and accommodation at High Camp can become a genuine challenge if you haven’t pre-booked.
Daytime temperatures: 10 to 18°C. Nights at High Camp: 0 to 5°C.
Pre-Winter (Late November to December)
This is my personal favourite window, and also the one I experienced firsthand.
Cold mornings, crisp air, very few other trekkers on the trail, and surprisingly clear skies. There’s a real chance of light snowfall in December, which adds magic to High Camp and the summit views.
Night temperatures at High Camp can drop to -5°C or below. Thus, proper layering is non-negotiable!
Winter (January to February)
Underrated by most, but genuinely beautiful for snow lovers. Very low crowds, the cheapest prices of the year, and dramatic snow-covered landscapes.
The risk is significant cold, potential trail closures after heavy snowfall, and reduced daylight hours.
Not ideal for beginners, but experienced trekkers who come prepared are usually rewarded with exceptional views.
Note: One thing that’s become increasingly important to note is season creep. Climate change has been shifting trekking seasons across Nepal. Monsoon has been extending into October, spring arrives warmer and earlier than before, and winter conditions vary more unpredictably year to year. Always check recent reports from other trekkers or locals before you finalise your dates.
Mardi Himal Trek Permit: How to Get It
Here’s something that confuses a lot of people, and I want to clear it up properly.
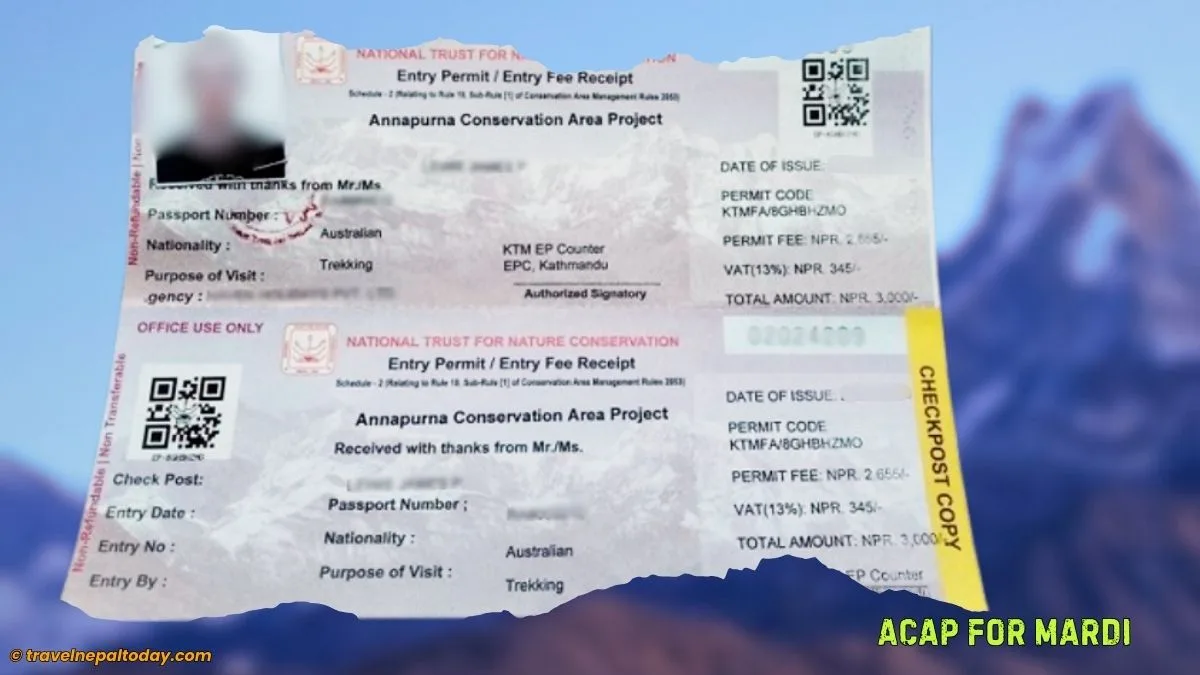
You only need one permit for the Mardi Himal Trek: the Annapurna Conservation Area Permit, commonly known as ACAP.
That’s it. No restricted area permit. No special local permit from Machhapuchhre Rural Municipality as of now. Just ACAP.
And the TIMS card? Let me bust that myth clearly:
TIMS is not compulsory for Mardi Himal as of 2026. There are no checkpoints checking for it on the trail, and nobody asks for it. You can get it through a registered agency if you want the extra safety record, but it’s optional, not required.
ACAP Permit Cost
| Nepali Citizens | Free |
| SAARC Nationals | NPR 1,000 |
| Foreign Nationals | NPR 3,000 |
| Children Below 10 Years | Free |
Your ACAP fee goes toward trail maintenance, conservation, waste management, wildlife protection, and supporting local communities in the Annapurna Conservation Area. It’s one permit that actually does something useful.
Where to Get Your ACAP Permit?
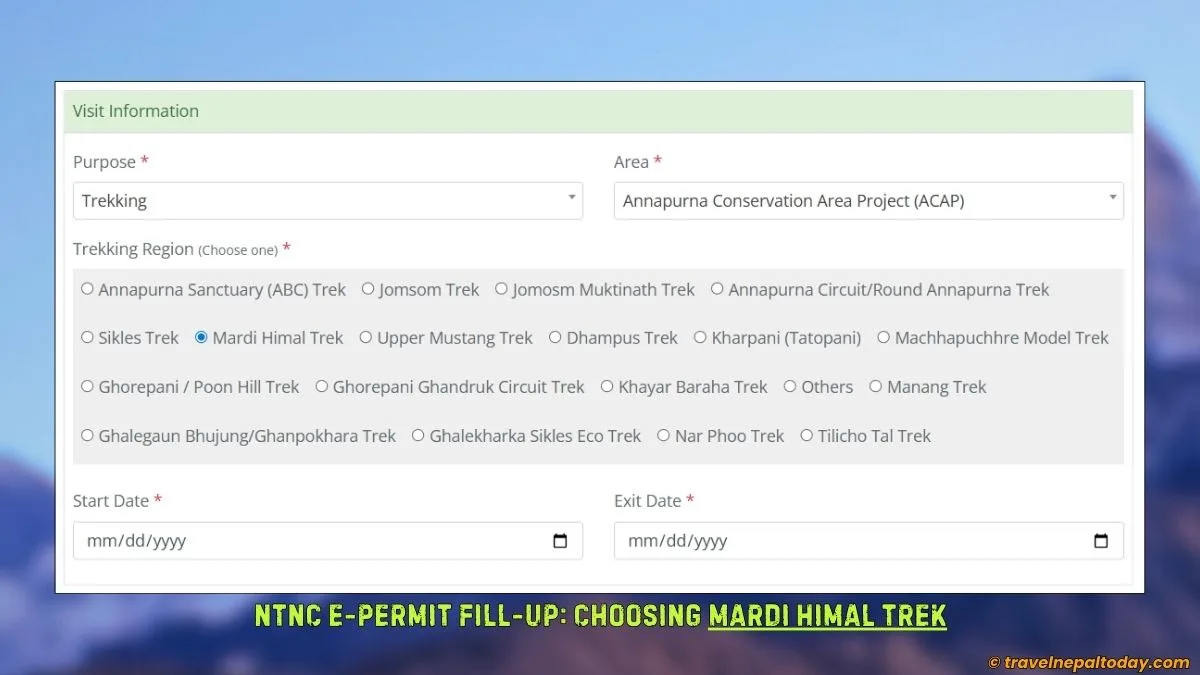
The easiest option in 2026 is the online route:
- Visit the NTNC e-permit portal.
- Select Annapurna Conservation Area.
- Choose Mardi Himal Trek as your route.
- Fill in your dates and details, pay online (note: a 2.9% gateway charge applies), and your permit will be emailed to you.
If you prefer to do it in person, NTNC and ACAP offices are available in Lalitpur and Kathmandu. There’s also an ACAP office in Lakeside, Pokhara, which is the most convenient option if you’re heading straight to the trail.
Getting it on the trail is technically possible but not recommended. NTNC can fine you NPR 6,000 (for foreigners) or NPR 2,000 (for SAARC nationals) if caught without a permit on the trail.
Key Permit Checkpoint
There’s a checkpoint at Pothana that you’ll pass through on the way to Pittam Deurali.
Make sure your ACAP permit is accessible. Keep it with you throughout the trek, as permit checks can happen anywhere along the route.
Note: New checkpoints are being constructed along the trail. So, you might need to show your permits there.
Food and Water on the Mardi Himal Trek
Once you leave Pokhara and start gaining altitude, food becomes simpler and more repetitive, but it honestly works.
The teahouse food on the Mardi trail is not fancy, but it’s filling, it’s warm, and it’s what your body needs while hiking for hours.
What to Eat on the Trail?

Dal Bhat is king on any trekking route in Nepal, and Mardi Himal is no exception.
The classic lentil soup, rice, and vegetable curry combo gives you sustained energy throughout the day. There’s even a saying on Nepal’s trekking routes: “Dal Bhat power, 24 hour.” And it’s true!
For breakfast, options usually include oatmeal, eggs, toast, pancakes, and noodle soup. For lunch and dinner, noodles, fried rice, soup, Dal Bhat, and pasta are available at most stops.
My personal tip: stick to vegetarian food all along the trail. Meat doesn’t get proper refrigeration on the trail, and the last thing you want is food poisoning at 3,500 m. Nnuts, protein bars, and dried fruits are great supplements to carry for snacking between meals.
What to Avoid?
Raw salads and unboiled water from unknown sources.
At higher elevations, tap water can cause stomach issues even if it looks clean. Carry purification tablets or a portable filter as backup.
Drinking Water on the Trail
Tea shops and lodges provide boiled drinking water, which is generally safe.
Above Low Camp, most drinking water comes from snowmelt. I always recommend carrying at least two reusable water bottles and purification tablets just in case.
Staying hydrated is especially important above 3,000 m. Aim for at least 3 to 4 litres of water per day at higher camps, as dehydration significantly worsens altitude sickness symptoms.
Network, Charging, and Internet Details
Cell network on the Mardi Himal trail are reliable up to Low Camp. Above that, you might have difficulty finding signals.
NTC (Nepal Telecom) tends to perform better in these remote sections compared to Ncell. If you’re heading into the trail for a longer itinerary, NTC is the safer bet for connectivity.
Charging is available via solar energy up to High Camp. Most lodges charge a fee (around NPR 200 to 300 per device), and availability can be limited during cloudy days since it’s purely solar-powered. So, a good power bank is non-negotiable!
Above High Camp, there’s no charging at the viewpoint or Base Camp. Make sure your devices are fully charged at High Camp before your summit morning.
Accommodations in Mardi Himal Trek: What to Expect
Accommodation along the Mardi Himal trail is in basic mountain lodges, also called ‘teahouses’. They’re simple, but they work.
And the hospitality from the lodge owners, who are mostly Gurung families, makes up for anything the rooms lack in comfort.
Stays are available at: Pittam Deurali, Sidhing, First Camp, Forest Camp (Kokar), Rest Camp, Kamkiku, Low Camp, Mid Camp, Badal Danda, Upper Badal Danda, and High Camp.
There are no lodges above High Camp. At the Mardi Himal Viewpoint, you’ll find a few tea shops for rest and refreshments, but no overnight stays.
The only exception is organized camping, which requires special NTNC permission and is not something most trekkers go for.
My personal recommendation is to spend your last night at High Camp and start your hike to the viewpoint and Base Camp early in the morning.
What the Lodges Are Like

Private rooms are available throughout the trail, though during peak season at High Camp, you may be asked to share.
Lodge owners prioritize international trekkers for private rooms during crowded months, so Nepalese trekkers sometimes end up on a sharing basis. This is a reality, not something to be upset about, just something to be aware of!
Basic room setup includes a bed (usually two per room), a thin mattress, blankets (both fiber and woolen), and sometimes a small table. Heating inside rooms is rare.
Most lodges have a communal dining area with a fire or heater where all trekkers gather in the evenings.
Hot showers are available at most lodges for an extra fee. Don’t expect long showers. Use what you need, warm up, and get out.
As you gain altitude, facilities become more basic and prices go up. This is standard across every trek in Nepal.
Lodge Packages vs Paying Separately
Most lodges offer a package system that covers your stay, dinner, morning tea or coffee, hot water, and breakfast for a fixed per-person rate.
If you’re doing the trek independently, this package usually works out cheaper than paying for each item separately.
I stayed at Rest Camp and High Camp during my 5-day trek, both on packages. It was simple, straightforward, and the lodge team at High Camp was genuinely good despite being understaffed during a busy day.
High Camp: Pre-Book If You Can!

High Camp is the busiest accommodation point on the entire Mardi trail, and during October and November, it fills up fast.
If you’re trekking during peak season, try to get your lodge owner or guide to contact High Camp in advance.
The extra effort on Day 2 of logistics is worth avoiding the stress of arriving to a full house at 3,553 m after a long day of hiking.
Gear Needed for Mardi Himal Trek: My Packing List
Let me be upfront about this. During my December trek, I made a few packing mistakes. I carried things I never needed and missed a couple of things I really wished I had. So this section comes from genuine experience, not just theory.
The core principle is simple: pack light, but pack smart. Every extra gram you carry is a gram you’ll feel during a 7-hour uphill stretch.


The Essentials (Non-Negotiable in Every Season)
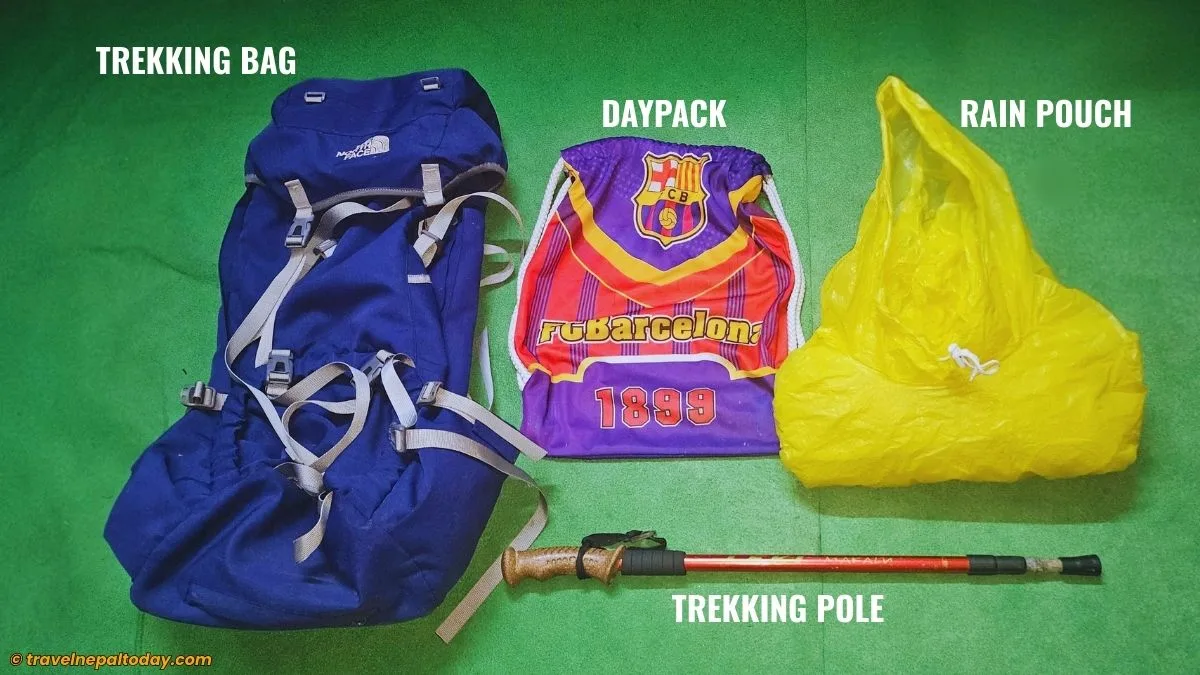
- Backpack and Bags: A 30 to 40-litre trekking backpack with proper shoulder straps and a rain cover is the base. If you’re hiring a porter, a smaller daypack works too.
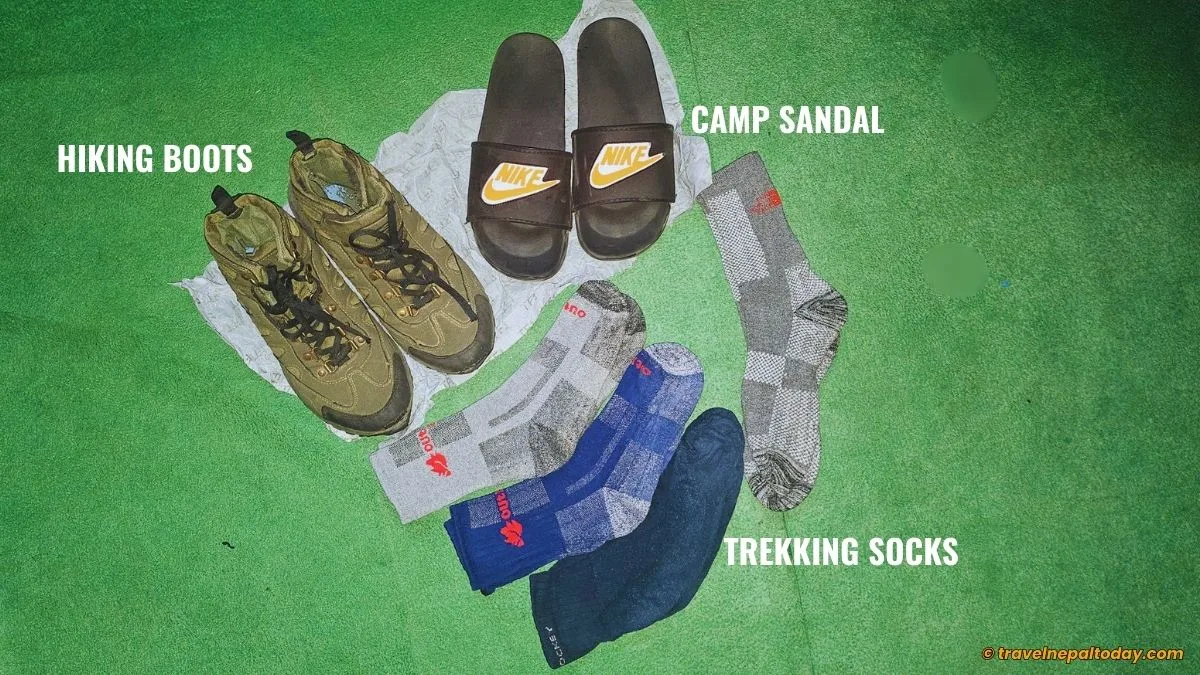
- Footwear: Well-fitted trekking boots that you’ve broken in before the trek are critical. Don’t make the mistake of wearing brand new boots on the trail. Bring 3 to 4 pairs of moisture-wicking socks, preferably wool.
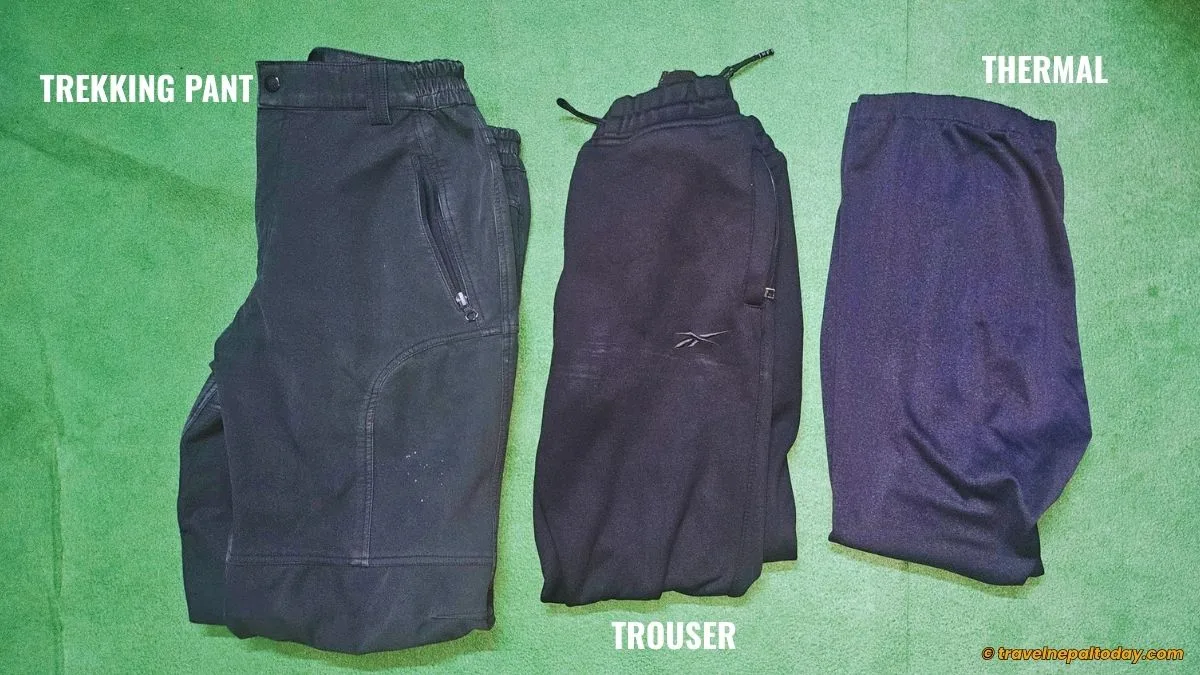
- Clothing: Moisture-wicking base layers, a fleece mid-layer, and a quality down jacket for above Low Camp. Trekking pants (two pairs, quick-drying). A waterproof outer shell for rain and wind. Warm gloves, a beanie, and a sun hat. Learn from my mistake on the beanie front: I brought one without fleece lining, and at High Camp in December, it was simply not enough. Go for a proper fleece-lined option if you’re trekking from October onwards.
- Gear: Trekking poles (optional but genuinely helpful on steep sections and long descents). A headlamp or flashlight is essential for the early morning summit hike. A power bank with enough capacity for at least two full phone charges. One to two reusable water bottles and water purification tablets.
- Personal and Health Items: Sunscreen and sunglasses are important because UV exposure increases significantly at altitude. Lip balm, basic toiletries, and a small first aid kit with pain relief medication, bandages, and your personal prescriptions. Hand sanitizer throughout the trek.
One final personal note: during my December trek, I developed an irritable bowel in the night at Rest Camp because I slept without enough blankets. I hadn’t checked that there was a second blanket on the other bed. Carry your basic medications and don’t assume the lodge will anticipate every need. A little self-sufficiency goes a long way.
For the complete Mardi Himal Trek packing list with seasonal notes and a full checklist table, check the dedicated packing guide here on TNT.
Independent vs Guided Trek: Which Should You Choose?
Most Nepalese trekkers do Mardi Himal independently, and I completely understand that. If you know the trail, have basic trekking experience, and are confident navigating with board signs, it’s absolutely doable on your own.
For international trekkers, my recommendation is to hire at least a local guide.
Not because the trail is extremely difficult to navigate, but because a good guide adds real value: they handle logistics, they know the lodges, they understand when altitude is affecting someone before the person themselves realizes it, and they’re genuinely better at making judgment calls in bad weather.
If budget is a concern, hiring a guide as part of a group splits the cost and makes it much more practical.
Guide and Porter Costs:
| Guide (per day) | USD 20 to 50 |
| Porter (per day) | USD 15 to 20 |
If you’d like help finding a guide for the Mardi Himal Trek, I’m also helping TNT readers connect with reliable options. Just reach out through this contact form.
Mardi Himal Trek Packages and Cost
The cost of the Mardi Himal Trek varies quite a bit depending on your nationality, trek duration, group size, season, and whether you go independent or agency-based.
Here’s an honest overview of what to expect:
Cost Overview
| Duration | For Foreign Nationals (agency-based) | For Nepalese |
| 3 days (from Pokhara) | USD 250 to 450 | Under NPR 10,000 |
| 4 days (from Pokhara) | USD 300 to 450 | NPR 10,000 to 12,000 |
| 5 days (from Kathmandu) | USD 390 to 1,000 | NPR 13,000 to 15,000 |
| 6 days (from Kathmandu) | USD 399 to 699 | NPR 14,000 to 15,000 |
| 7 days (from Kathmandu) | USD 399 to 699 | NPR 15,000 to 20,000 |
| 8 days (from Kathmandu) | USD 555 to 750 | NPR 15,000 to 20,000 |
What Affects Your Total Cost
- Nationality: Nepalese trekkers have a significant cost advantage. No permit fees, no guide requirement, lower accommodation expectations in most cases. Foreign nationals pay for ACAP, guide services, and generally stay at slightly better lodges.
- Group size: Sharing costs within a group brings down individual expenses significantly across transportation, accommodation, and even food. When I trekked with my friends, we ordered different dishes and shared them. More variety, lower cost per person.
- Season: Peak months (March to May, October to November) are when lodge prices are at their highest and jeep fares are less negotiable. Off-season comes with noticeable discounts.
- Starting point: Kande remains the cheapest starting point for Nepalese, since only a local bus is needed. Pittam Deurali requires a jeep transfer, which increases cost slightly but saves trekking time.
- Independent vs agency-based: Going with a registered agency adds guide and logistics costs but handles everything for you: permits, transportation, accommodation booking, emergency planning. For foreign nationals especially, this convenience and safety layer is usually worth it.
What a Typical Package Includes
Most Mardi Himal Trek packages from registered agencies include ACAP permit, licensed guide, porter (in some packages), accommodation on a twin-sharing basis, breakfast and dinner on the trail, all ground transportation from Kathmandu or Pokhara (always verify these before booking).
What’s typically excluded: international flights, Nepal visa, personal gear, tips for guide and porter, extra snacks and drinks on the trail, and hot showers.
Always read the inclusions and exclusions carefully before booking. And allocate at least USD 30 to 50 as emergency buffer even on an all-inclusive package.
Travel Insurance and Safety Tips
Travel insurance for the Mardi Himal Trek is not compulsory, but I treat it as essential. Here’s why and what to actually do about it.
On insurance:
- The trek reaches 4,500 m at Base Camp. If something goes wrong above the road network, helicopter evacuation is your only realistic option.
- A single helicopter rescue from High Camp can cost anywhere from USD 1,500 to USD 3,000 depending on conditions and weather. Without insurance, that cost falls entirely on you.
- Make sure your policy specifically covers high-altitude trekking up to at least 4,500 m, helicopter evacuation, emergency medical treatment, and trip cancellation.
- Not all standard travel insurance policies include high-altitude trekking. Read the fine print before you pay.
On starting early every day:
- The clearest skies, coolest temperatures, and lowest fatigue are all in the first few hours of the morning.
- On summit day especially, leaving High Camp before 4 AM gives you the best conditions at the Viewpoint. The cloud cover that builds up by mid-morning can block your entire view if you’re late.
On altitude:
- If you have a persistent headache, unusual exhaustion, or nausea above 3,000 m, descend. That’s the rule. No exceptions.
- I’ve seen experienced trekkers turn back at High Camp because their body said stop. That’s not failure. That’s wisdom.
- AMS symptoms can start from as low as 2,500 m. Don’t wait to see how bad it gets before taking action.
On food and hydration:
- Skip meat above Low Camp. Refrigeration doesn’t work the way it should at altitude, and food poisoning at 3,500 m is a serious problem.
- Drink consistently even when you don’t feel thirsty. Dehydration at altitude happens faster than at sea level.
- Aim for 3 to 4 litres of water per day at higher camps.
On High Camp pre-booking:
- During October, November, March, and April, High Camp fills up fast. Arriving late with no pre-booking during peak season can put you in a very difficult situation.
- Ask your agency or your guide to contact High Camp lodges at least one day in advance.
On packing your medicines:
- At Rest Camp in December, I developed an irritable bowel from sleeping cold on a single blanket. I had the meds and it was sorted by morning. But if I hadn’t had them, that night would have been rough.
- Always carry basic essentials: ORS packets, pain relief, anti-diarrheal tablets, and if your doctor recommends it, Diamox for altitude.
On trekking solo:
- Let someone know your itinerary before you leave. Share it with your Pokhara hotel, your agency, or a friend back home.
- On a well-travelled route like Mardi Himal, this often feels unnecessary. But on a quiet pre-winter or winter day when there are fewer people on the trail, it genuinely matters.
Final Words
In short, the Mardi Himal Trek is one of the best short treks in Nepal, offering a balance of accessibility, mountain views, and flexible itineraries. It’s ideal for beginners as well as experienced trekkers looking for a quick Himalayan experience.
The Mardi Himal Trek has a way of surprising you. It looks short on paper, and in some ways it is!
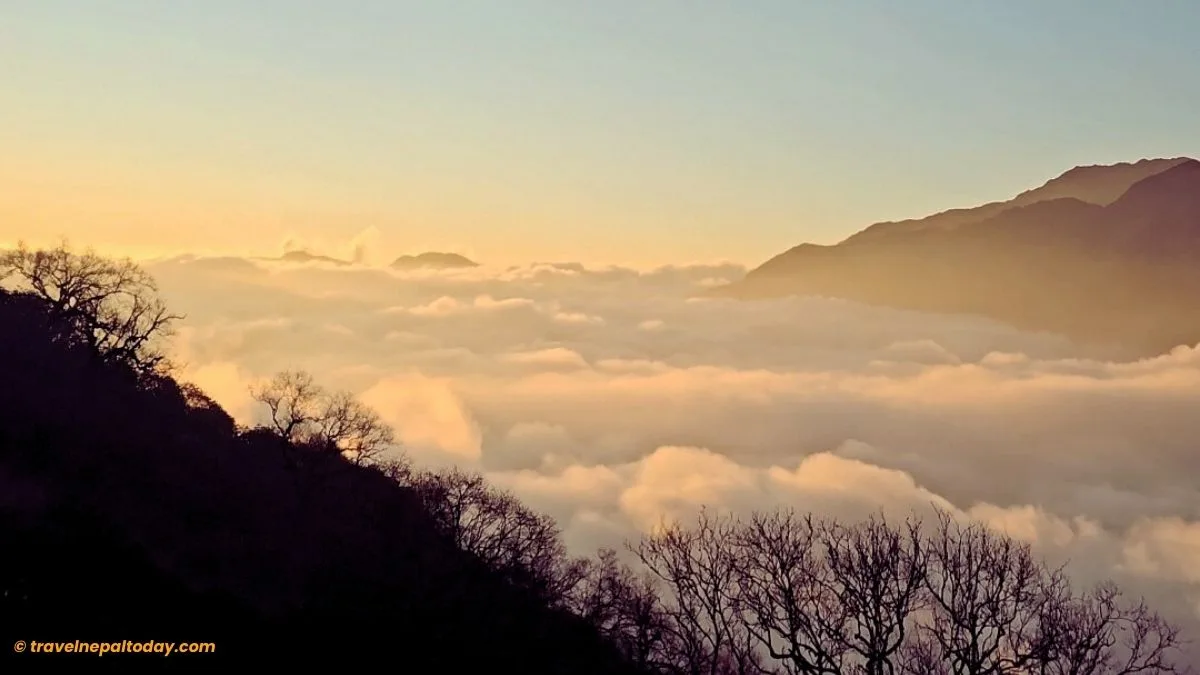
But once you’re above the clouds at High Camp with Machhapuchhre towering in front of you and the mountains glowing in the last light of the day, short doesn’t feel like the right word anymore.
It’s complete. It gives you the forests, the altitude, the Gurung culture, the mountain views, and those quiet mornings that only the mountains can give you. All in a few days.
Whether you’re going for 3 days or 8, whether you’re a first-time trekker or someone who’s done Everest Base Camp twice, there’s something on this trail for you!
I hope this deatiled guide has given you everything you need to plan your Mardi Himal Trek properly.
And if there’s something I haven’t covered or something you experienced on the trail that’s different from what I’ve written, drop it in the comments! I’m always updating these guides with new information.
Happy travelling to Kaski!
Quick Answers
When was the Mardi Himal Trek route officially opened?
Before that, the ridge toward Mardi Himal was mainly used by shepherds and occasional off-trail adventurers.
Today, it has a proper trail with teahouses and lodges up to High Camp (3,553 m), with a further push to Base Camp at 4,500 m.
For a route that’s just over a decade old, the growth in infrastructure has been impressive, with new lodges and improved signage every year.
Is the Mardi Himal Trek good for complete beginners?
On a 6 or 7-day plan, the daily elevation gain stays manageable, the trail is well-marked, and there’s no technical climbing involved anywhere on the route.
The key is the itinerary. The 3-day version includes a very long 11 to 12-hour day, which is not ideal for beginners. Spread over 6 days, the same trek becomes much more comfortable.
During my own trek, one person in our group was on their first high-altitude hike. They made it to the viewpoint. Tired, yes, but they made it and enjoyed it.
How is the Mardi Himal Trek different from the Annapurna Base Camp Trek?
Both treks are in the Annapurna region and start from Pokhara, but they’re quite different in character.
The Annapurna Base Camp Trek takes 7 to 12 days, reaches 4,130 m, is more crowded, and follows a valley route.
The Mardi Himal Trek is shorter (3 to 8 days), less crowded, follows a ridge, and reaches up to 4,500 m.
The ridge route gives a completely different perspective of the mountains. Many trekkers who’ve done ABC actually prefer Mardi for its quieter and more personal feel.
What is the difference between the Mardi Himal Viewpoint and Base Camp?
These are two different points on the same summit-day hike.
The Viewpoint (4,200 m) is the main panoramic spot where most trekkers go. This is where you get the best views.
Base Camp (4,500 m) is a further 1.5 to 2 hours ahead. The terrain is more rugged, and you gain an additional 300 m elevation.
Both are done on the same day from High Camp. Whether you continue to Base Camp depends on your energy level and weather conditions.
Can you combine the Mardi Himal Trek with Annapurna Base Camp?
Yes, and it’s a great option if you have 14 to 16 days.
You can do Mardi first and then connect to the Annapurna Sanctuary route, or do ABC first and branch toward Mardi on the return.
This is not a standard itinerary, so it usually requires custom planning with a guide or agency.
What is the height of Mardi Himal, and can you climb it?
Mardi Himal stands at 5,587 m.
It is classified as a trekking peak, but climbing it requires technical mountaineering skills, gear, and a permit from the Nepal Mountaineering Association.
The standard trek only goes up to Base Camp at 4,500 m, not the summit.
What happens if it snows during the Mardi Himal Trek?
Light snowfall above High Camp can actually enhance the experience, making the landscape more beautiful.
Heavy snowfall, however, can make the trail dangerous, especially between High Camp and the Viewpoint due to ice and low visibility.
In such cases, the best decision is to wait or descend.
Always check with your lodge owner or guide before starting the summit push.
Is altitude sickness a risk on the Mardi Himal Trek?
Yes, altitude sickness is a real possibility on the Mardi Himal Trek.
Even though it’s considered a moderate trek, you still reach 4,500 m at Base Camp and sleep at 3,553 m at High Camp. That’s well within the altitude range where AMS (Acute Mountain Sickness) can occur.
Symptoms can start from as low as 2,500 m. Headaches, nausea, loss of appetite, and unusual fatigue are the early signs.
The good part is that the itinerary is flexible. If you give yourself 5 to 6 days, your body usually gets enough time to adjust.
The biggest mistake is rushing. Most altitude issues on Mardi happen on the 3-day itinerary where people push too fast.