3-day Mardi Himal Trek is actually possible, but only from Pokhara. And it’s also recommended only for those with prior trekking experience!
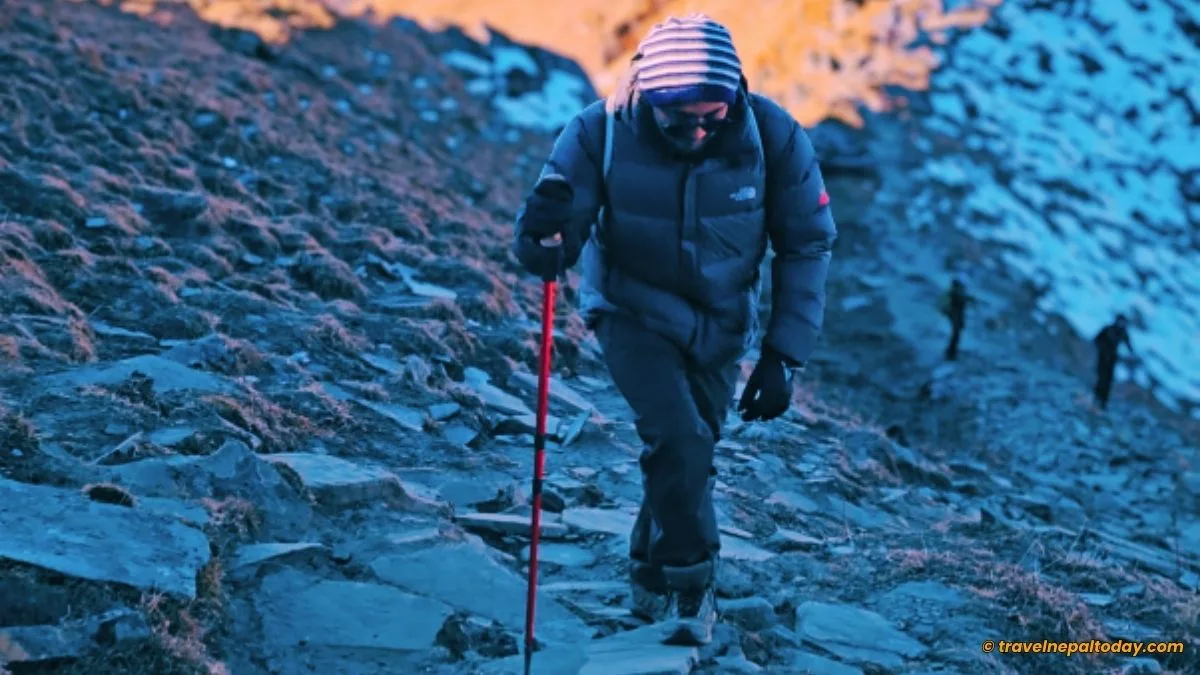
Never underestimate this trek because you have to reach up to 4,500 m (Base Camp) and sleep at 3,553 m (High Camp). Gaining elevation so quickly carries a great risk of altitude sickness.
Another important factor is that you have to walk a lot on this itinerary, particularly the final part, which calls for 21 km in a single day!
Personally, I’d recommend a 4-day or 5-day trek from Pokhara. But if you’re really looking forward to the Mardi Himal Trek 3 days, buckle up for this detailed guide!
Key Facts About Mardi Himal 3-Day Trek
| Trek Difficulty | Intermediate |
| Route Overview | Pokhara > Pittam Deurali > Rest Camp > High Camp > Sidhing > Pokhara |
| Best Time | March to October |
| Suitable For | Expereinced |
| Budget | USD 250 to USD 450 for Foreign nationals |
| NPR 10,000 for Nepalese |
Mardi Himal Trek 3 Days Fast Itinerary From Pokhara
To be really honest with you, Mardi Himal in 3 days is not possible from Kathmandu. It’s only feasible if you’re already in Pokhara.
That said, you need at least 5 days from Kathmandu for the overall trip. So, those of you in the capital, make sure to reach Kaski first.
Then, follow the below 3-day itinerary from Pokhara:
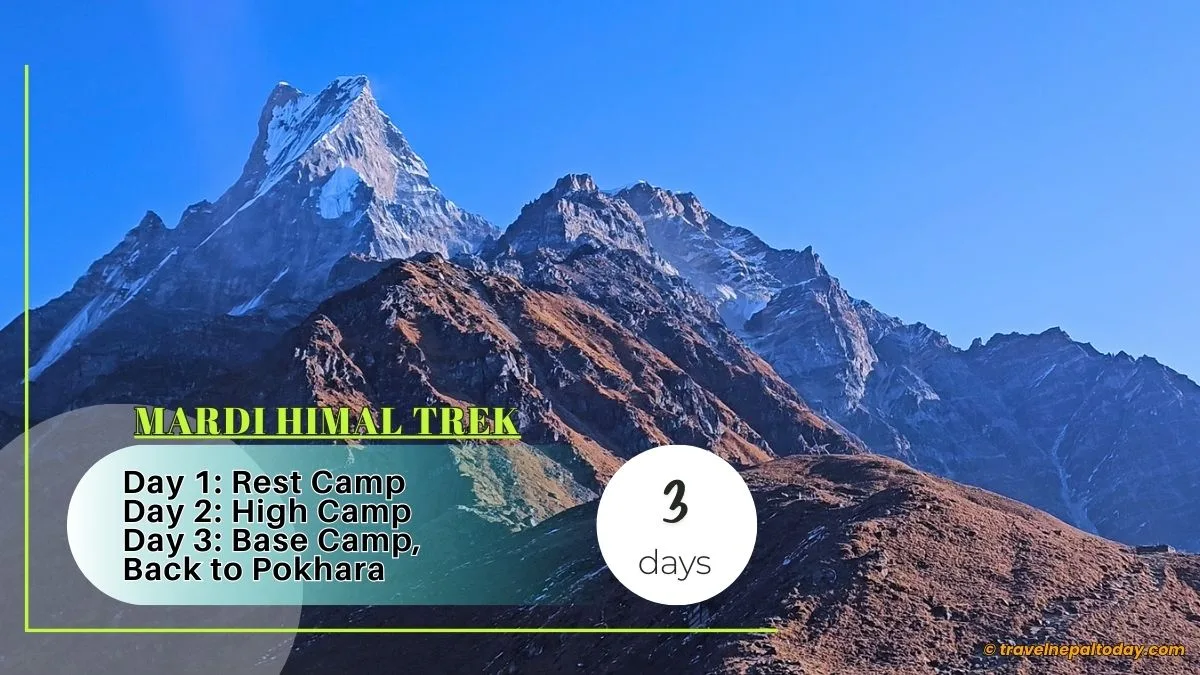
Day 1: Pokhara to Pittam Deurali Drive, Reach Rest Camp
| Drive Distance | 28 km |
| Drive Duration | 2 to 2.5 hours |
| Hike Distance | 9 km |
| Hike Duration | 5 to 6 hours |
| Elevation Gain | 1,778 m |
| Difficulty Level | Easy |
The first step is to reach the starting point of the Mardi Himal Trek. My preferred option was Pittam Deurali (2,137 m), and I recommend the same.
You can either get a jeep or a bus from Hari Chowk (922 m). I’ve explained about this in another guide related to Mardi Himal trek transportation, so do check that out.
Important: Foreign trekkers are required to show permits halfway. The jeep driver or your own guide will stop you on the way and lead you through the process, so no need to worry. Just remind them if needed. Permits (ACAP) are arranged by the trekking agency or can be applied for online via NTNC’s official website.
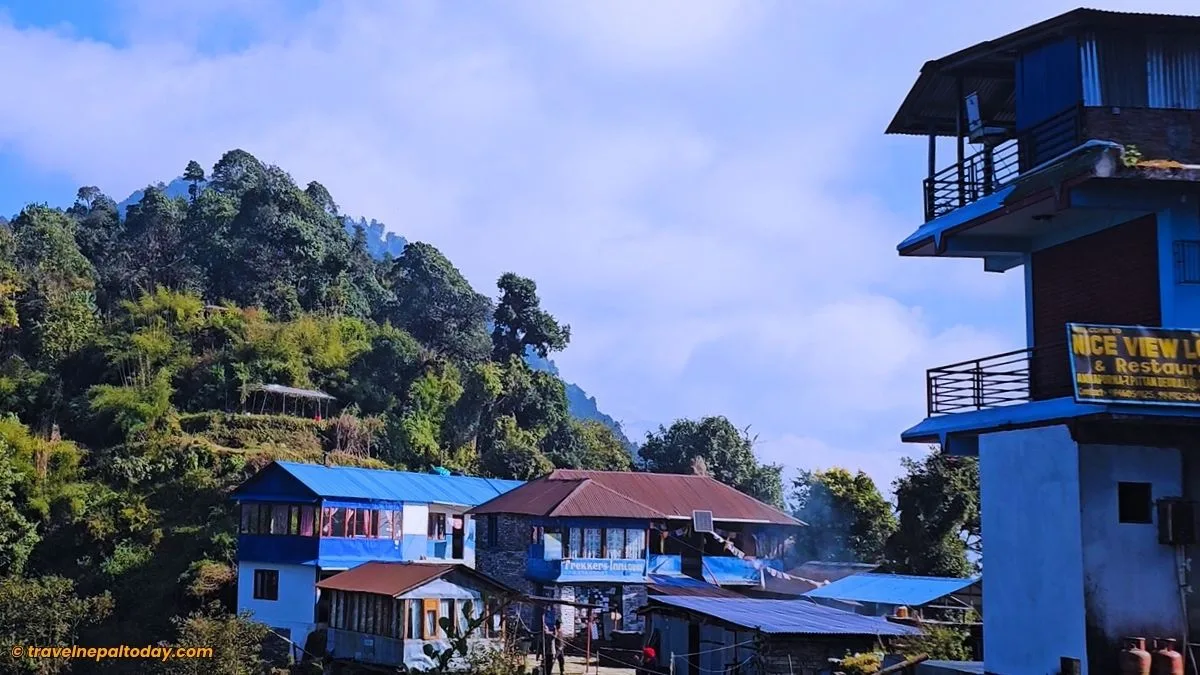
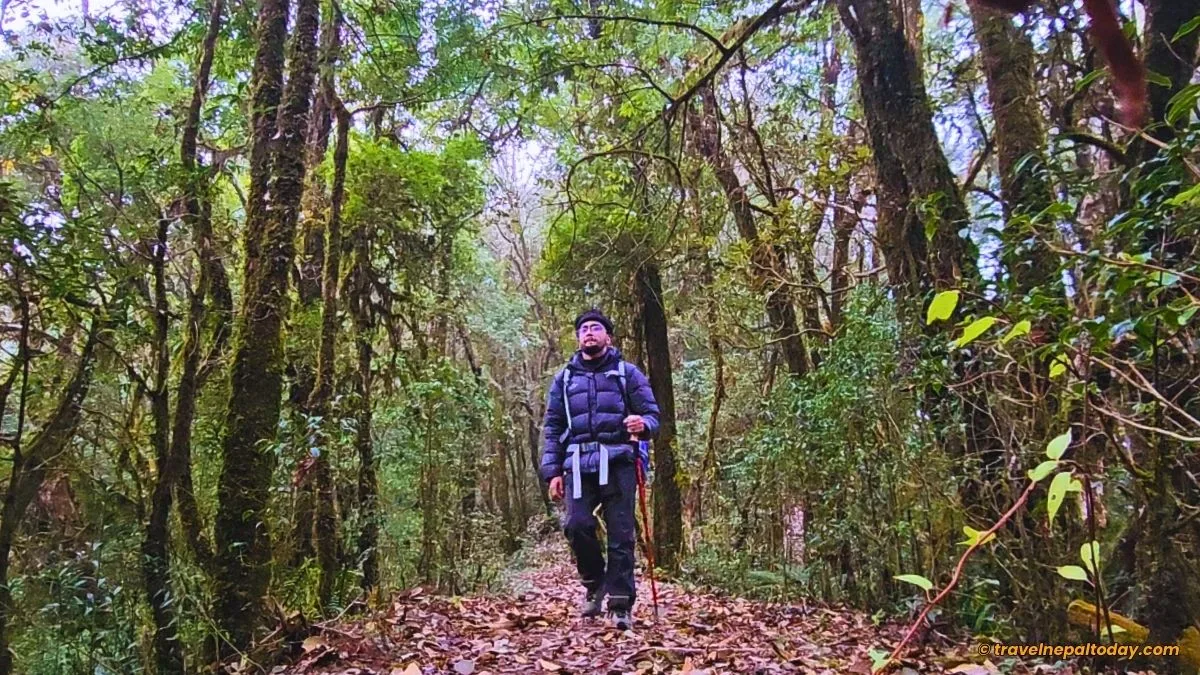
Upon reaching Pittam Deurali, you’ll start the hike. Stop at Suire Danda (2,440 m) for lunch, then continue to Dhod Kharka (2,559 m), followed by Besal Baari (2,572 m). Within 5 hours (including a 1-hour lunch break), you should reach Forest Camp, aka Kokar (2,448 m).
There should be ample time to push up to Rest Camp (2,700 m). But if you’re trekking in winter, you may have to stay at Forest Camp itself, which is the preferred option for most trekkers.
There are no major attractions today. It’s entirely a forest route, with rhododendron, oak, birch, maple, and hemlock trees.
Day 2: Rest Camp to High Camp
| Hike Distance | 6.5 km |
| Hike Duration | 6 to 7 hours |
| Elevation Gain | 853 m |
| Difficulty Level | Moderate |
Wake up early today, as the sunrise from Rest Camp is spectacular. In the right season, clouds in the morning can make your experience even more memorable.
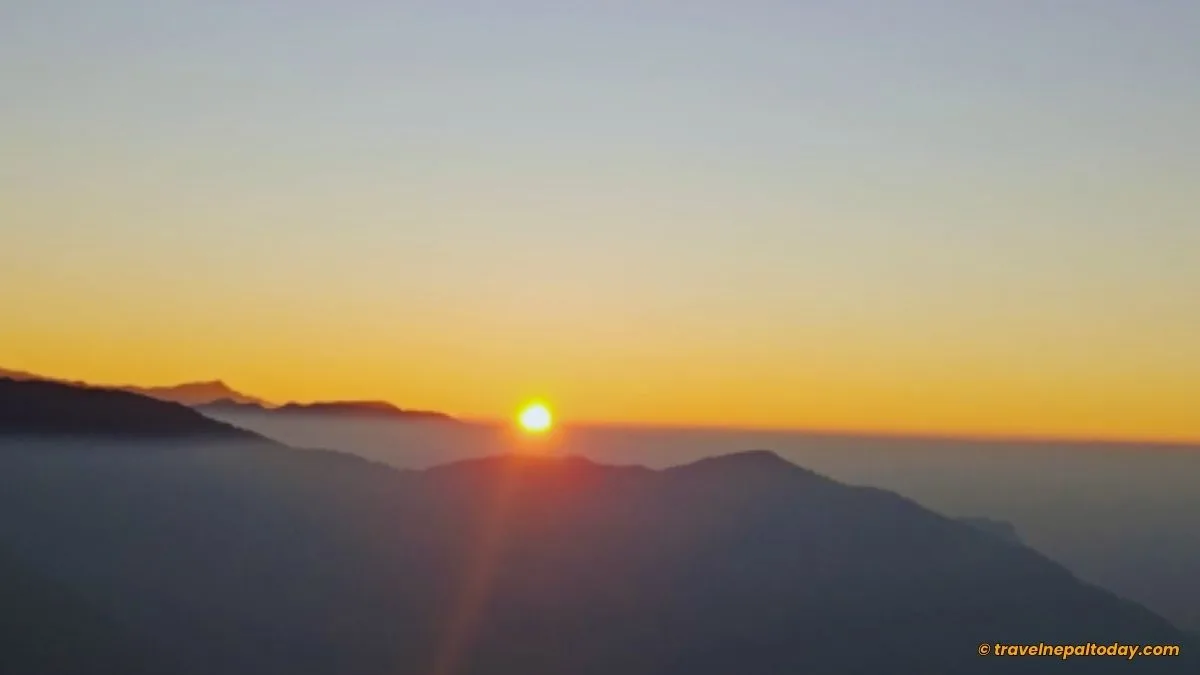
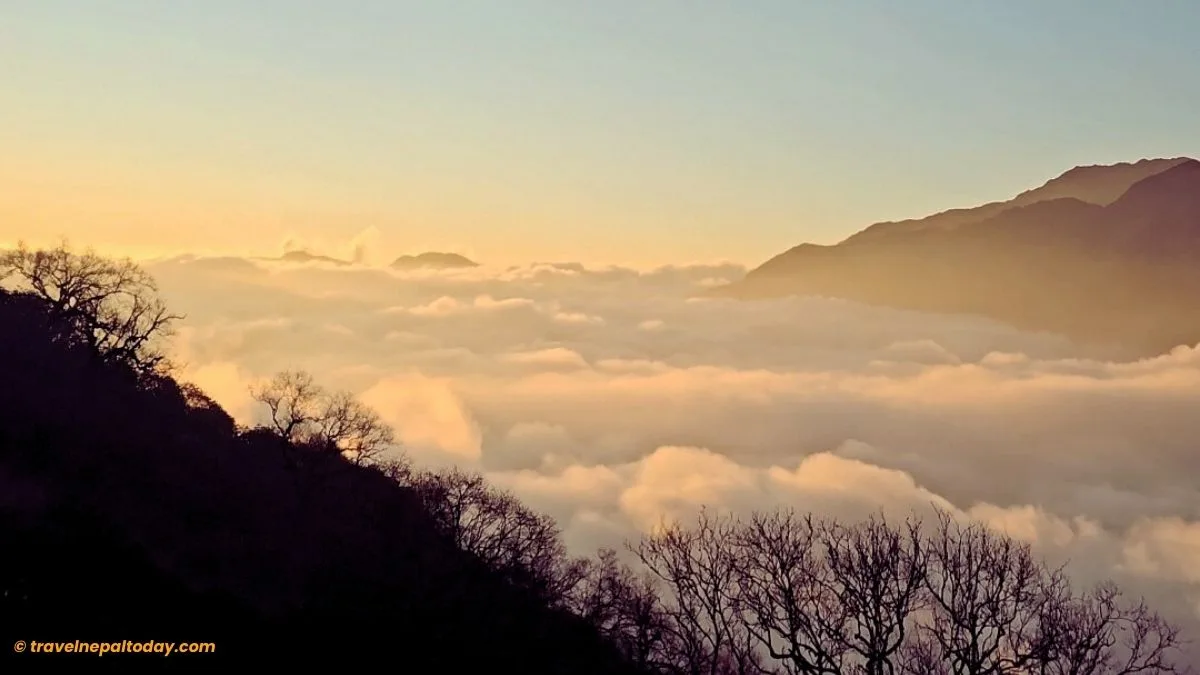
Today, you’ll head to Kamkiku (2,793 m), followed by Low Camp (2,970 m), Mid Camp (3,209 m), and Badal Danda (3,300 m). It’s a great spot to pause, and if lucky, the cloud inversion makes you feel like you’re above the clouds.
You can have lunch there or go slightly higher to Low High Camp, aka Upper Badal Danda (3,357 m). These spots bring Machhapuchhre, Annapurna South, and Hiunchuli even more closer!
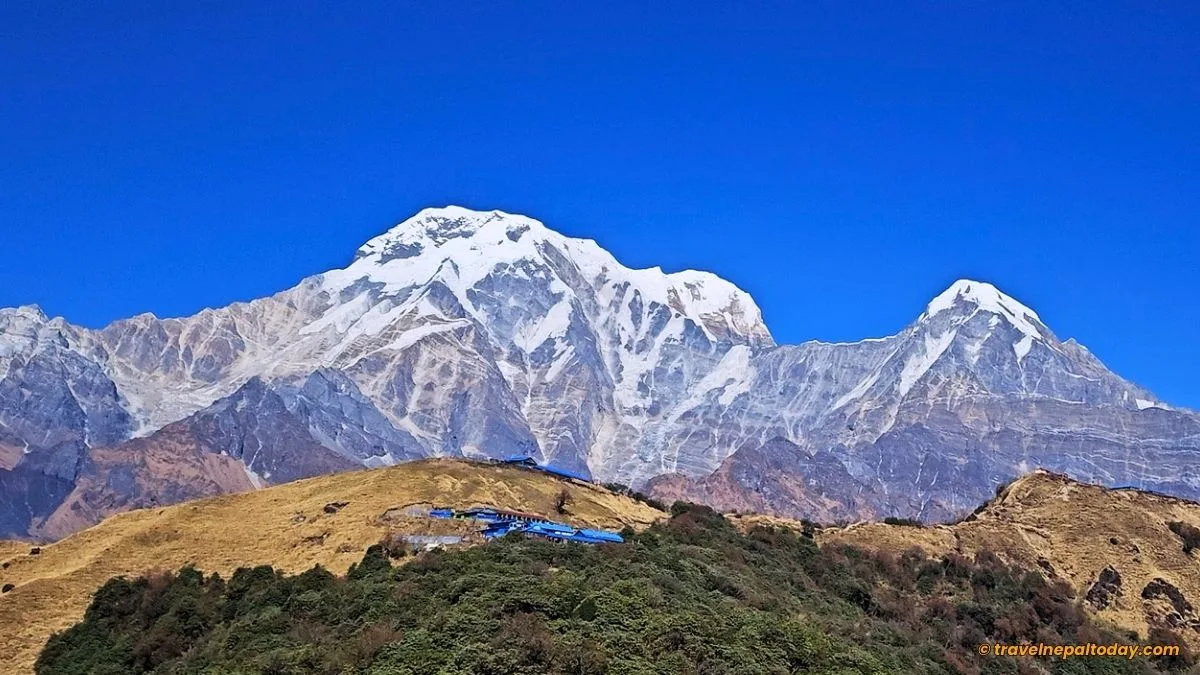
At the end, it’s a little uphill to reach High Camp (3,553 m). If you’re following this itinerary right, you should be able to reach there before sunset to enjoy the golden views of the three mountains.
Don’t just sit inside the dining. Explore the surroundings, right beneath the mountains, where cloud inversion adds a magical touch for sure!
One it’s evening time, stay in the warm dining area, enjoy the firewood warmth, and don’t forget to fill your thermos for the night. Staying hydrated at high altitudes is essential.
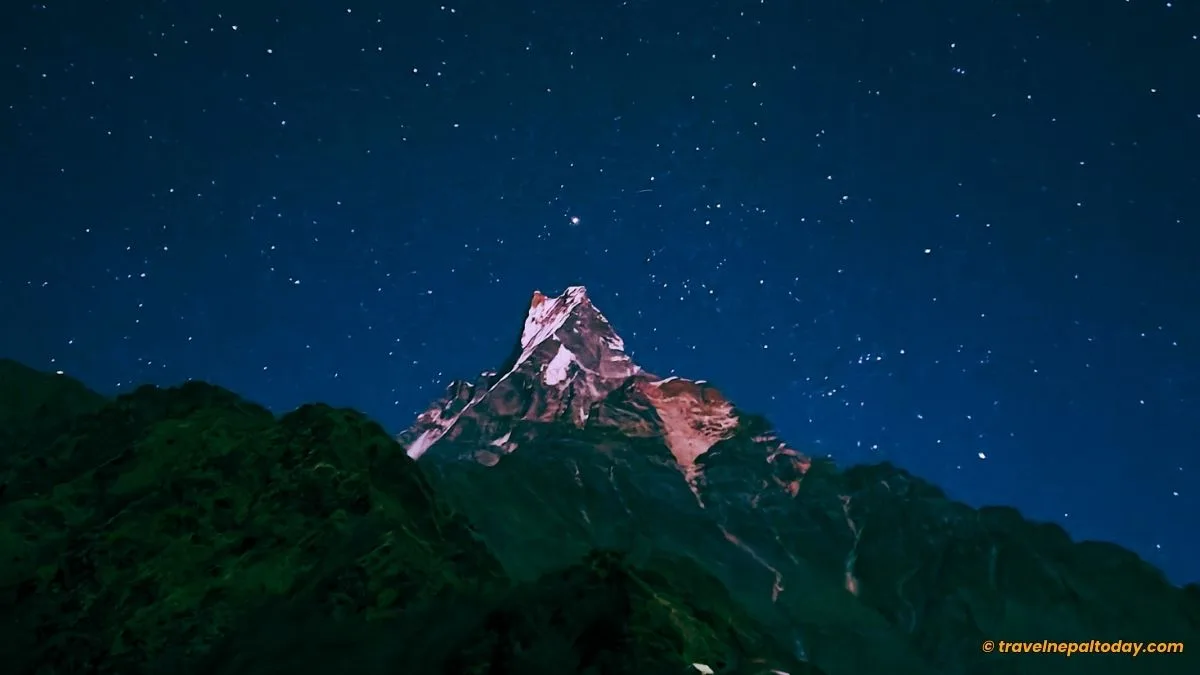
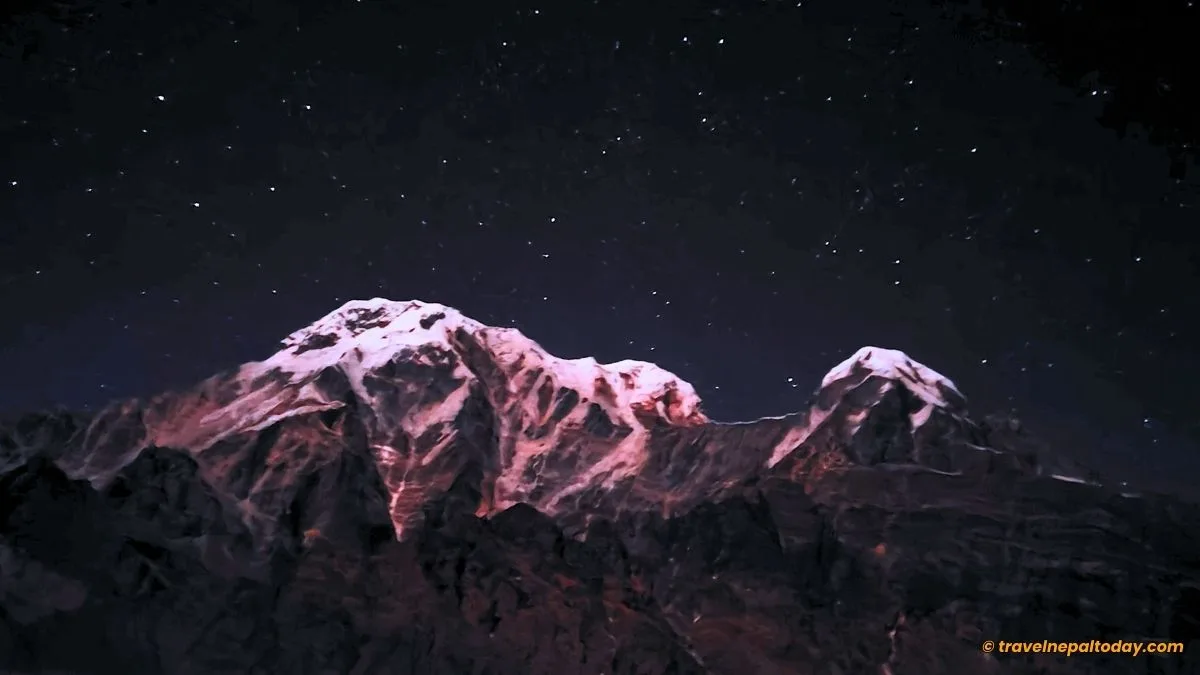
You’ll meet both local and international trekkers, so socialise! And if the weather is clear (mostly in late autumn and winter), be sure to get out for stargazing.
Sleep early, as you’ll need to wake up at 3 am for the next hike. So, for your packing list, be sure to carry a headlamp or reliable torch. Or you may drain your phone if you’re using it for light!
Day 3: Reach Base Camp, Low Camp to Sidhing, Back to Pokhara
| Hike Distance | 21 km |
| Hike Duration | 11 to 12 hours (excluding breaks) |
| Drive Distance | 31 km |
| Drive Duration | 2 to 2.5 hours |
| Elevation Gain | 947 m |
| Difficulty Level | Difficult |
Here comes the most difficult day of the trek.
Waking up at 3 AM is tough for many. Before starting, check signs of AMS. Don’t hike in the chilly morning if you’re showing symptoms. Rather, seek help from your guide or lodge staff.
In winter, water in drums freezes! So, my dear Nepalese and South Asian trekkers, be sure to carry wet tissues or toilet paper!
For the final hike, don’t forget to fill your water bottle full, as there won’t be refill points in between, though a few tea shops at viewpoints sell tea.
The morning hike may feel cold, but as the sun rises, you’d be glad you’ve done the Mardi Himal Trek! Stars, sunrise, and the Milky Way make it a paradise for astrophotography lovers, too.
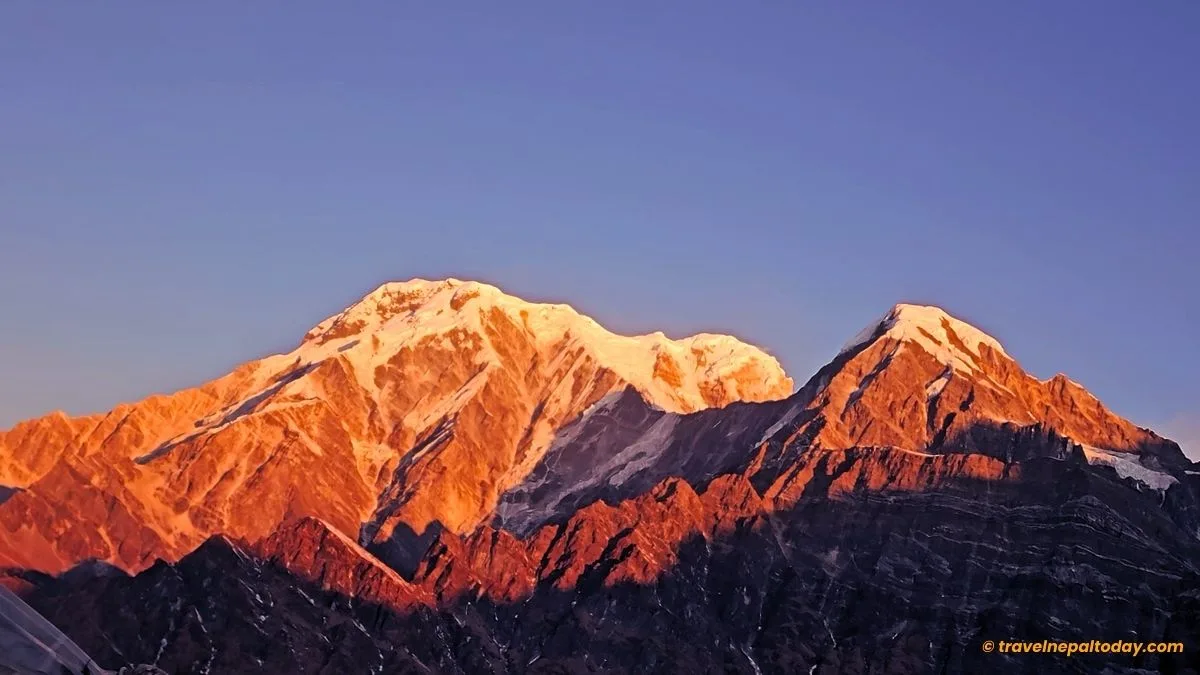
Passing via Lower Viewpoint (3,981 m), you’ll reach Upper Viewpoint, aka Mardi Himal Viewpoint (4,200 m). That’s where you get one of the best sunrise views in Nepal.
Mountains appear even closer, especially Mardi Himal (5,587 m) and Machhapuchhre (6,993 m). You can also see distant peaks like Khangsar Kang, Tarke Kang, Tare Kang, Asapurna, and Gangapurna.
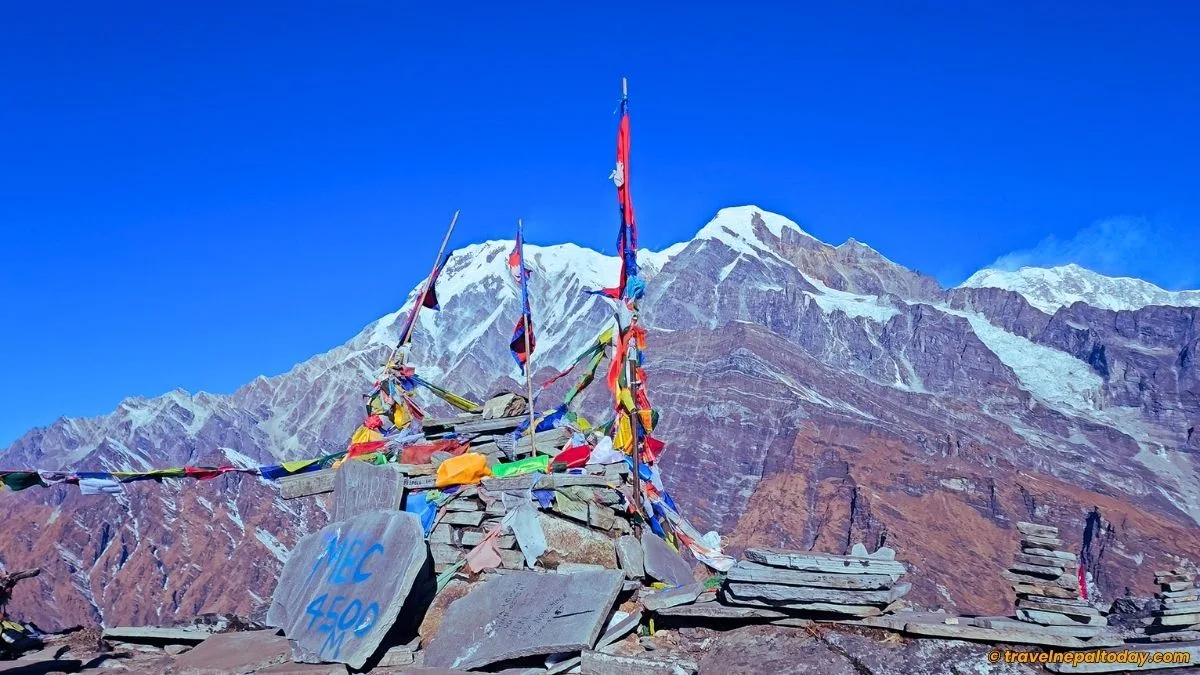
While many make a return, I highly recommend proceed ahead. First to Lower Base Camp (4,218 m) and then to Mardi Himal Base Camp (4,500 m), which happens to be the west base camp. It’s just about 1.5 to 2 hour away from the viewpoint, so definitely don’t miss it.
No need to spend too much time here, as you’ve already gained significant elevation (1000 m).
Now, return to High Camp via the same route and have your breakfast in the lodge you stayed in. This is when you’ll realize the insane number of stairs you had climbed before dawn.
Pack your things and proceed to Low Camp. From here, we now have to follow a different route that takes you to Sidhing village, passing smaller settlements like Takaichi (2,285 m) and Ratencho (2,092 m).
The route is completely downhill, so to those of my readers who are prone to knee issues, I highly suggest wearing knee caps and ankle binders. Another tip: heighten your trekking stick for better support!
The trail to Sidhing (1,751 m) is fully forested, with rhododendron, oak, magnolia, and pine trees. Remember, we have to complete the trek today, so pace yourself and be mentally prepared!
That heavy breakfast at High Camp should suffice. If not, you can still stop briefly at the local lodges along the way.
The jeep station is actually in a place called Bhimjung (1,935 m). You can hire a reserved or shared jeep to Pokhara there itself. And for those of you who have booked with travel agencies, arrangements will be handled by them.
The evening ride to Pokhara takes 2 to 2.5 hours, covering 31 km. The bumpy ride will make you hungry for sure, but once in Lakeside, you can directly go to a restaurant or have your dinner in your hotel itself.
Returning to Kathmandu is not possible the same day unless a late-night bus is lingering around in Prithvi Chowk. But instead of forcing yourself for that, I suggest staying overnight in Lakeside to celebrate your trek completion and get proper rest.
Alternative 3-Day Mardi Himal Trek Itineraries
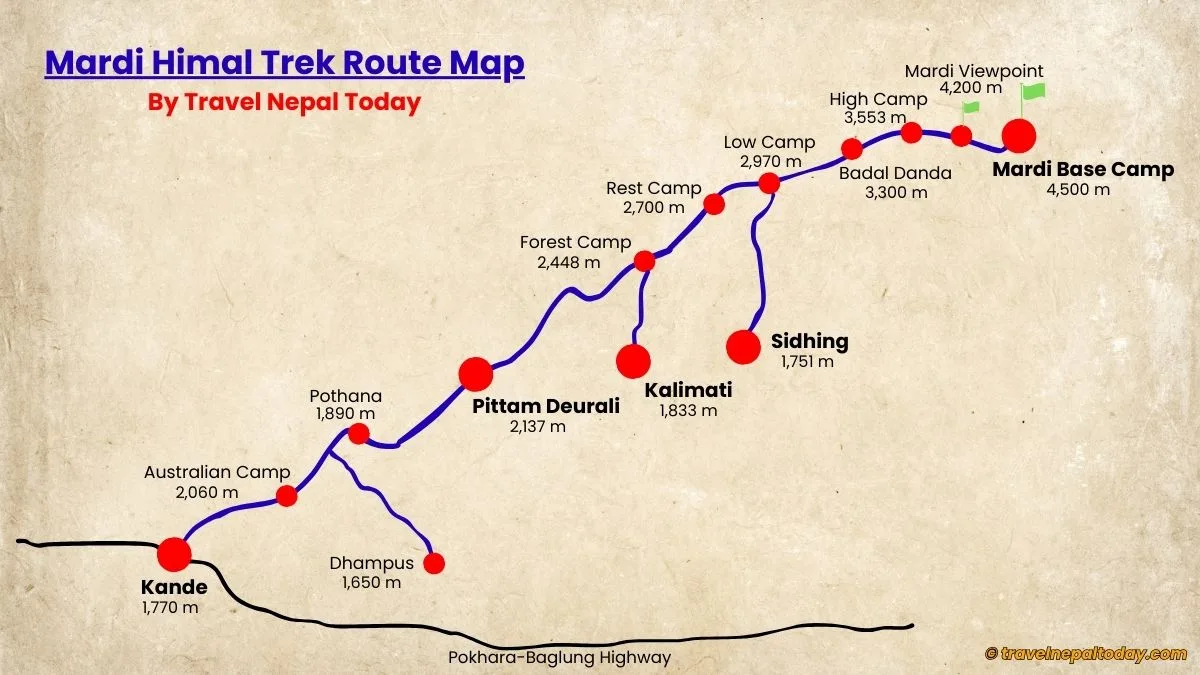
Pittam Deurali is the best starting option from my pov, but those wishing to visit Australian Camp can start from Kande for sure. Yes, it’s possible within 3 days, but a little hectic.
And if you start from Sidhing or Kalimati, it reduces total distance from 36 km via Pittam Deurali to 30 km and 32 km, respectively.
Read below for more details:
Start From Kalimati
The Mardi Himal Trek route via Kalimati (1,833 m) is becoming more popular in recent times among local trekkers. Forest Camp in just about 2 to 3 hours!
Too much time is saved, especially if you compare it with Kande. Upon connecting to Forest Camp, it’s the same route, of course.
And here’s the itinerary:
- DAY 1: Pokhara to Kalimati Drive, Reach Rest Camp
- DAY 2: Rest Camp to High Camp
- DAY 3: Reach Base Camp, Back to Kalimati, Drive back to Pokhara
Start From Sidhing
Starting from Sidhing requires a 4 km steep uphill through the forest. Not recommended, but if you’re willing, it allows you to complete the trek much faster compared to any other itinerary:
- DAY 1: Pokhara to Sidhing Drive, Reach Low Camp
- DAY 2: Low Camp to High Camp
- DAY 3: Reach Base Camp, Back to Sidhing, Drive back to Pokhara
Start From Kande
Kande to Sidhing is approx. 42 km and is the longest Mardi Himal trek route. However, this part of the trail is culturally more rich than any other.
You’ll even get to explore Australian Camp (a popular stop) and pass Pothana (2,060 m) before reaching Pittam Deurali. There are hidden short routes that you can ask locals or your guide will lead you.
- DAY 1: Pokhara to Kande Drive, Reach Forest Camp
- DAY 2: Forest Camp to High Camp
- DAY 3: Reach Base Camp, Low Camp to Sidhing, Drive to Pokhara
Note: You can even start your trek from Dhampus, which is a popular Gurung village to stop by. Many trekkers opt to stay here a day prior and start the trek the next day.
Is 3-Day Mardi Trek Difficult? Challenges Explained
In our Mardi trek difficulty guide, we explained why it’s in the ‘moderate’ category. But honestly, for 3 days, it’s a bit intermediate. That slight difficulty part is because of the third day’s 21 km hike.
Just a tip for readers out there: trekking is supposed to be done in a more relaxed way. Trying to rush your way, as we have explained in this itinerary, is actually a bad approach. And only those who really really want to do it due to lack of time should go for this at their own risk.
Whether it be ascending too fast or descending, proper rest is absolutely necessary. It’s about your safety. Imagine if you break your leg, no more treks for you, right? So, still, if possible, I recommend adding one day to this itinerary.
Here are the main challenges on this 3-day adventure:
- Getting to high altitude fast means your body gets very little chance to acclimate, which increases the risk of altitude sickness.
- A tight schedule with no buffer day is risky. Imagine if weather goes bad or you get injured. In this 3-day plan, you’ll walk long kilometres and are more prone to injuries.
- For beginners, I wouldn’t recommend this itinerary at all. Walking 21 km in a single day is a big task, even for experienced trekkers.
- Instead of enjoying nature, you’ll end up pushing yourself hard. Even if you like challenges like this, don’t force others to do it the same way.
- Your body gets more tired, and you may be deprived of proper sleep too.
- There’s immense psychological pressure. This itinerary is made for those seeking a high-altitude challenge, so if you’re not one of them, I have covered other itineraries for you.
Best Time to Do This 3-Day Mardi Trek
So you think you’re ready to go for the Mardi Himal Trek 3-day challenge? Well, if so, the best time would be the warmer season (from March to October).
That’s because the daylight hours are longer, and you don’t have to take the risk of hiking in the late evening.
Also, it’s less cold compared to the winter time (from November to February). And just to let you know: our human body handles altitude better in warmer weather.
Remember, never hike at night. And it’s not just about Mardi, all other or other treks in any part of the world. The risk of wildlife cannot be overstated.
Lastly, only go for this challenge when weather is ideal, temperature hasn’t droped too much, and trail conditions are good.
Avoid the prime monsoon and winter.
3-Day Mardi Himal Trek Cost & Packages
The overall Mardi Himal trek cost or budget differs for Nepalese and international tourists.
Nepalese can expect to complete this 3-day trek under an NPR 10,000 budget, which is quite ideal.
Personally, I completed the trek within a 7,000 budget. And from my experience, this is how it should go on a per-person basis (remember this is just an idea, the cost may be lower or higher, that’s why I’m suggesting 10k):
- Vehicle Expenses: NPR 2,500 to 3,000
- Rest Camp Package: NPR 1,500 to 1,700
- High Camp Package: NPR 1,500 to 1,800
- Snacks and Extras: NPR 1,000 to 1,500
For foreign trekkers, the prices vary depending on whether you’re trekking independently, with a freelance guide, or with a travel agency.
The best option is definitely choosing a registered trekking agency because you’ll be safer and everything else will be handled for you!
Packages for the Mardi Himal Trek usually cost USD 250 to USD 450, depending on how reliable the agency is and the level of luxury you prefer. Generally, this price covers your vehicle expenses, BLD during the trek, guide fees, porter fees, etc. Overall, it’s a good deal, but I suggest tipping the guides and porters.
But which agency should you choose? Well, our TNT team is working on reviewing travel agencies through various means, and we’ll soon update it here on the site with the best ones.
But for the time being, you can fill up the form below to book your Mardi Trek, and we’ll get back to you with the best possible option:
Remember: Travel Nepal Today is not a trekking or travel agency. Our job on the internet is to provide you with actual and factual information about Nepal and also help you out in every possible way so you get to explore the beauty of ours.
Bonus Tip: Gear to Carry For Your 3-Day Mardi Trek
Mardi Himal Trek in 3 days is, without a doubt, a challenge. So, to accomplish that, you need the right gear to make trekking in this part of the Annapurna region more comfortable.
I believe the following products will surely help you achieve your goal:
| Item | Where to Get | |
| Amazon | Daraz | |
| Trekking Poles with shock absorber for steep descents | Cascade Mountain Tech Lightweight Aircraft-Grade Aluminium Trekking Poles | 4-Section Portable Outdoor Fold Trekking Pole |
| Knee Support | McDavid Hex Knee Pads | Tynor Knee Cap |
| Headlamp | Coast XPH30R 1500 Lumen USB-C Rechargeable Dual Power Headlamp | High Power Led Headlamp |
| Energy Gel or Bars | Nuun Sport Electrolyte Tablets + GU Energy Gel | Vegan Dairy Nepal 55g Protein Bars |
| Oxygen Booster Can | Boost Oxygen Pocket Size Natural 3L Canister | Portable Oxygen Can-960ml |
| Blister Prevention Tapes | KT Health Blister Prevention Tape | Anti-Septic Handiplast |
Final Words
In the end, I would still suggest going for a 4 or 5-day itinerary over the 3-day plan. You should always listen to your body and add a buffer day in case anything unusual happens.
This Mardi Himal Trek 3 days itinerary is meant for professional hikers who have already hiked above 4,000 meters before and know the mountains well. Definitely, it’s not for beginners!
We have listed other guides too: 4-day, 5-day, 6-day, 7-day, and 8-day guides here. So check them out and pick one that really suits you. Don’t go for your trek without being well-prepared.
Happy travelling to Kaski!!