Mardi Himal Trek has become a trending trek destination, not just among locals but also among international visitors. It is actually perfect for those who cannot allocate long days for major treks in the Himalayas.
It is a short adventure, and even beginners can do it easily. The highest point of the trek is Mardi Himal Base Camp at 4,500 meters. But if you are scared to go that high, even reaching Mardi Viewpoint at 4,200 meters is a great achievement.
Views of Mt. Machhapuchhre, Mardi Himal, Annapurna South, and Hiunchuli are the most prominent. But along with the mountains, clouds and forested trail are other major highlights.
I personally opted for the Mardi Himal Trek 5 days itinerary, and today, this guide is going to be more about my story. I will share practical tips along with the hidden secrets of the Mardi Trek that nobody tells you. Let’s get started!
Key Facts About 5-Day Mardi Himal Trek
| Trek Difficulty | Intermediate |
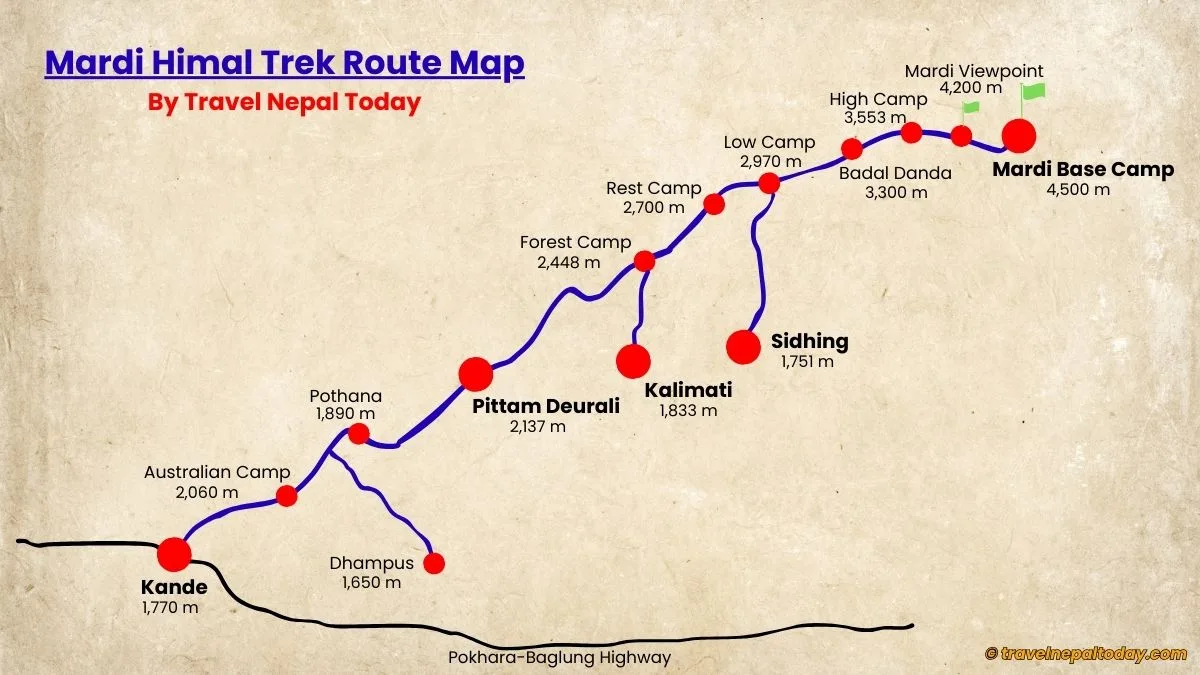
| Route Overview | Kathmandu > Pokhara > Pittam Deurali > Rest Camp > High Camp > Sidhing > Pokhara > Kathmandu |
| Best Time | March to November |
| Suitable For | Experienced |
| Budget | USD 390 to USD 1000 for Foreign nationals |
| NPR 13,000 to 15,000 for Nepalese |
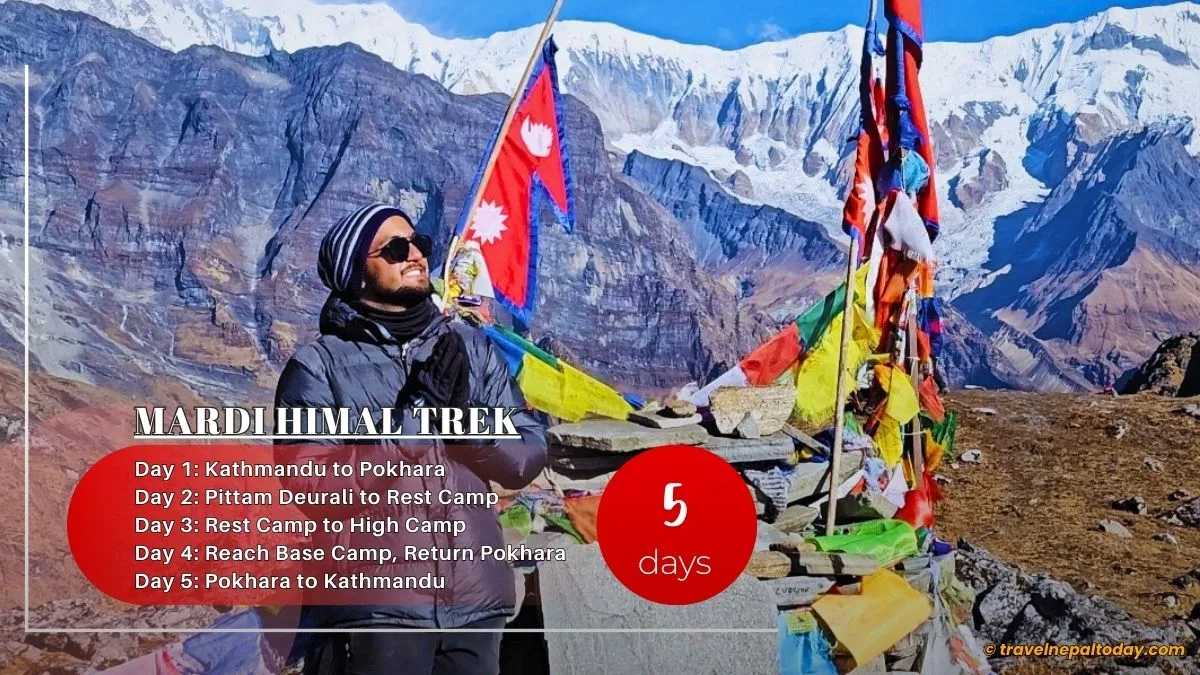
Mardi Himal Trek 5 Days Short Itinerary
My trek was short but followed a slightly fast approach back in December 2024. This is what I had opted for:
Day 1: Kathmandu to Pokhara, Stay at Prithvi Chowk
Drive distance: 200 km
Drive duration: 6 to 7 hours
Elevation gain: -500 m approx.
Day 2: Hari Chowk to Pittam Deurali Drive, Reach Rest Camp
Drive distance: 28 km
Drive duration: 2.5 to 3 hours
Hike distance: 9 km
Hike duration: 5 to 6 hours
Elevation gain: 1,778 m
Difficulty level: Easy
Day 3: Rest Camp to High Camp
Hike distance: 6.5 km
Hike duration: 6 to 7 hours
Elevation gain: 853 m
Difficulty level: Moderate
Day 4: Reach Base Camp, Take Sidhing Route, Drive Back to Pokhara
Hike distance: 21 km
Hike duration: 11 to 12 hours (excluding breaks)
Drive distance: 31 km
Drive duration: 2 to 2.5 hours
Elevation gain: 947 m
Difficulty level: Difficult
Day 5: Pokhara to Kathmandu
Drive distance: 200 km
Drive duration: 6 to 7 hours
Alternative 5-Day Mardi Himal Trek Itinerary
Since, at that time, the Prithvi Highway was under construction, even the passenger van I got on took almost 7 to 8 hours, making it an entire day count.
Fast forward to 2026, this is not the case. The drive to Pokhara now takes no more than 6 to 6.5 hours on a passenger van, and slightly more on a bus.
So, you can actually complete the 5-day itinerary in a much more relaxed manner. Here’s how:
Day 1: Kathmandu to Pokhara (You can choose an evening passenger van, or you can even opt for a night bus.)
Day 2: Pokhara to Pittam Deurali drive, reach Rest Camp
Day 3: Rest Camp to High Camp
Day 4: High Camp to Base Camp via Viewpoint, reach Low Camp
Day 5: Low Camp to Sidhing, drive to Pokhara, return to Kathmandu on a night bus
Not to forget, you can choose your starting point from Kande, Kalimati, or Sidhing too. Kande becomes the longest option, Sidhing is the shortest but more difficult, and Kalimati is the easiest and fastest.
Those interested can even start from Dhampus. Otherwise, Pittam Deurali works perfectly, just like it did for me.
Recommended reading: Mardi Himal Trek Transportation Guide
My Story: Mardi Himal Trek 5 Days From Kathmandu
Today’s article is more than just a guide. I will be sharing my complete story of my 5-day Mardi Himal Trek. My journey had started solo, but I ended up making new friends, and they remain connected with me on my social media even today.
The trek came with vehicle issues and almost damaging my flip phone, but also experiencing spectacular mountain views and light snow at the very end.
Here’s my full story. I hope you’ll enjoy it.
Chapter 1: Reaching Pokhara a Day Prior
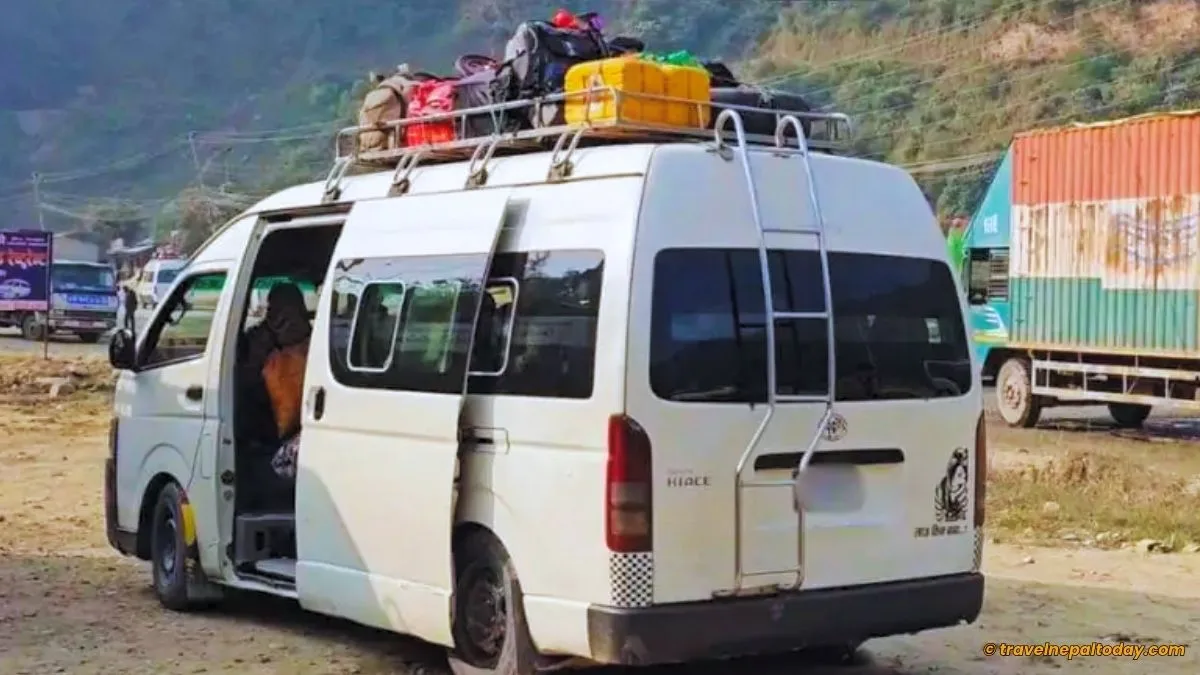
My bags were ready, and in the afternoon, I left home and reached Kalanki. This is what I usually do when travelling to Pokhara from Kathmandu. The passenger vans are all set to move, and if you reach the ticket counter on time, you can get into one of them quickly.
But this time, I had to wait. About 30 minutes or so. The advantage was that I got a solo seat. This trip of mine was not actually completely alone, though. Two of my friends from Pokhara were supposed to join me the next day.
My plan was to reach Pokhara by the evening and stay in either Hari Chowk or Prithvi Chowk. While everything was going smoothly, the first twist happened. Our passenger van broke down somewhere in Shuklagandaki, along the Prithvi Highway.
Thankfully, all the passengers were escorted to a bus that was surprisingly empty and had arrived at the right time. Travelling alone and incidents like this can sometimes be frustrating.
Chapter 2: Night Stay in Prithvi Chowk
I reached Prithvi Chowk and got off the bus with no hotels booked, fully positive that I just needed to stay the night wherever I could find a place.
I did not want to go to Lakeside that day, as it would have been a little too expensive. Budget travellers will get my decision here.
There was one uncle who looked all set to take me directly to his hotel. And anyway, I had no plans, so I decided to go with him on his scooter.
These guys are working really hard to get customers. Just appreciating their hard work and becoming a client is sometimes a good thing to do.
I just stayed in, had my dinner, charged my devices, and went to sleep early. It was my friends’ plan, so they had already booked our bus seats to Pittam Deurali. I was only supposed to reach Hari Chowk early at 7 AM the next day.
Chapter 3: Reaching Pittam Deurali, The Starting Point
Pokhara’s weather was fantastic. But one problem was that the Fishtail mountain (Mt. Machhapuchhre) was snowless. It felt more like a rocky hill rather than the 6,993 m mountain we know it to be.
Global warming, of course. The shift in seasons, melting glaciers, less snowfall, etc. Everything is happening at an alarming rate, and that sight was just one example.
I had my chickpeas and boiled egg for breakfast. While this uncle had promised to drop me at Hari Chowk, he just backed off, giving me some random excuse. That’s what it is. Business done, service forgotten.
I booked myself a ride and reached Hari Chowk, met my friends, and we were waiting for the bus. But that’s when we learned that the bus had backed off too.
I mean, you are providing a service and you just say you’re not ready to go. That was perhaps because there were no others heading to Pittam Deurali.
The thing is, many start the Mardi Himal trek from Kande, and those who want to reduce time have started hiking from Kalimati. So, we were the only ones who knew about the bus that went to Pittam Deurali.
But honestly speaking, I did not find the service reliable. You should at least keep your promise.
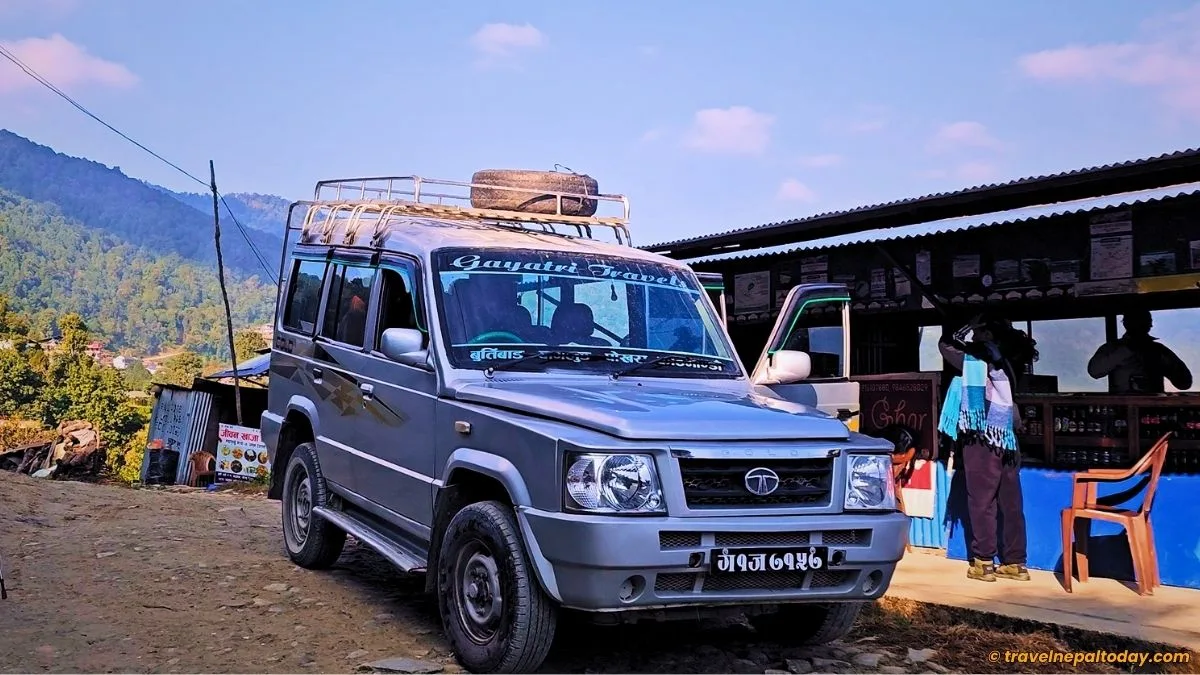
So, we had to start the enquiry yet again. A direct jeep to Pittam Deurali was too expensive. So, we decided to hop on a passenger van to Dhampus. There were enough people, so we had to pay about NPR 400 per person only.
Upon reaching Dhampus in 1.5 hours, we got another jeep to Pittam Deurali, which was a little cheaper compared to what we would have had to pay directly from Pokhara.
After an hour’s drive from Dhampus, we reached our starting point, and without wasting much time, we began the hike immediately!
Chapter 4: Pittam Deurali to Rest Camp
I was all ready to take on the adventure. Just around a month back, I had done the Phoksundo Lake Trek, and now, Mardi. Those memories were still lingering, not just in my head but in another friend’s too. Our communication throughout the trek was more about Phoksundo than Mardi itself.
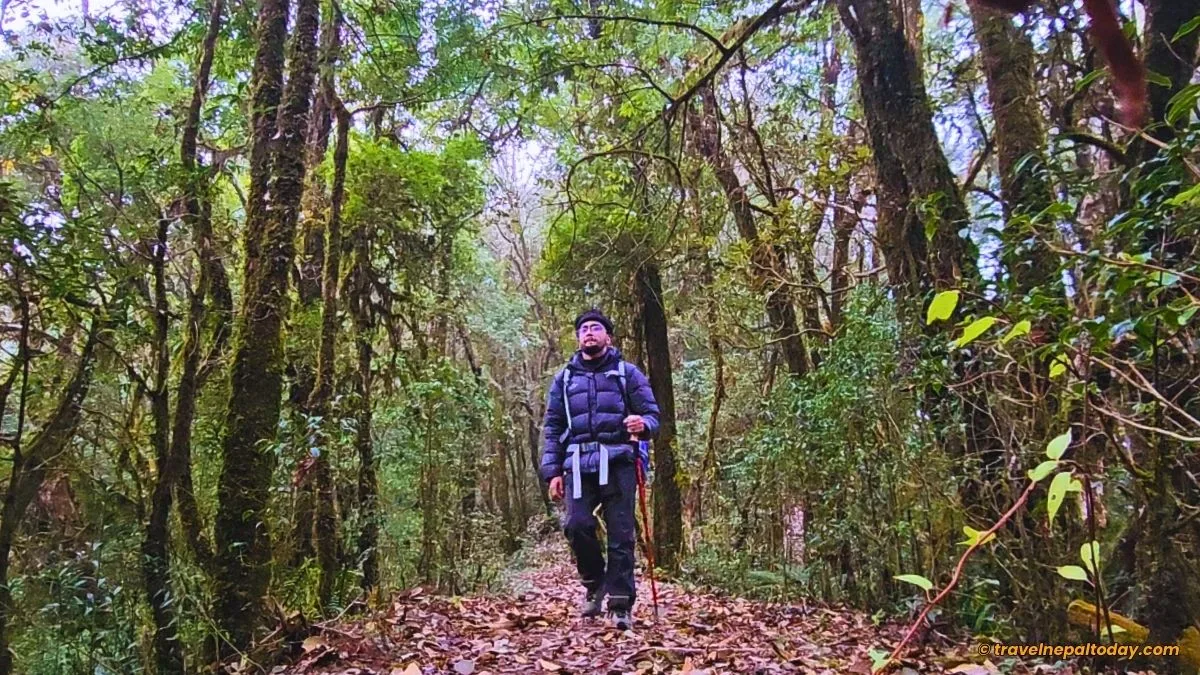
As our team of three approached the first uphill, I noticed that from Pittam Deurali itself, we could connect along the trail of the iconic Annapurna Base Camp trek. It’s like Mardi Trail is on the upper hill and the ABC on the lower.
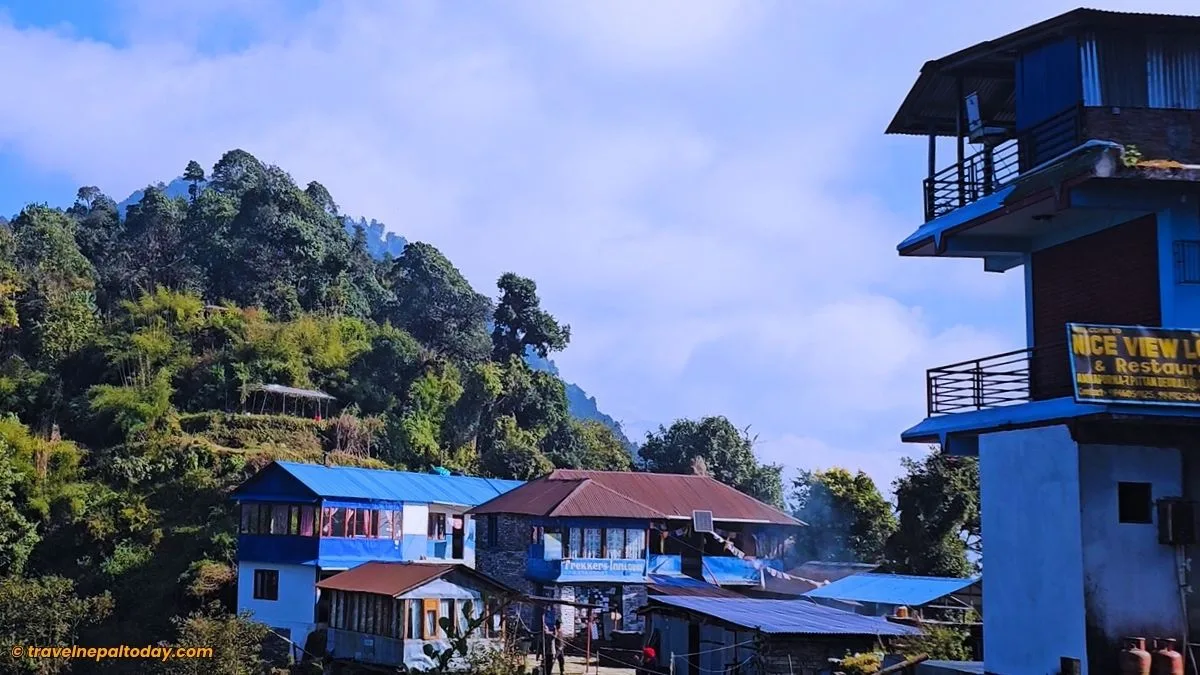
The jungle route took us first to Suire Danda (2,440 m), where we stopped for lunch. While we wanted to make it short, a village representative was there to talk about the Pittam Deurali bus.
And of course, we made sure our voices were heard. I don’t know how seriously the old man took it.
I would love to hear about your experience if you try the Pittam Deurali bus yourself. Be sure to comment below!
It was a hearty lunch: Dal Bhat Tarkari—the classic on Nepal’s trekking routes. We all had the veg set, which I always recommend during treks, especially when you’re in the higher regions. You wouldn’t want to try stale meat and fall ill.
We continued along the forested route, with board signs helping us navigate well. Our aim was to reach Low Camp today, but it was already a little late considering the vehicle issues.
We passed via Dhod Kharka (2,559 m) and Besal Baari (2,572 m). Somewhere in between was the First Camp, but only a hut-style lodge was available.
Along the way, we were accompanied by three guys. The six of us were almost together everywhere. Luckily for me, I had found new partners with whom I could share a room.
Upon reaching Rest Camp (2,700 m) after crossing Forest Camp, aka Kokar (2,448 m), I was determined to reach Low Camp too. It was just about a 1 to 1.5-hour extra push.
But all the other five looked tired and suggested that we stay here. They were absolutely right: there was no point in rushing, as whether we started from Rest Camp or Low Camp, the highest we could go would be High Camp tomorrow.
So, following everyone’s agreement, we booked ourselves on a package per person. Evening had set in, and we were all lined up near the fireplace to get some warmth.
My new friends were full of fun. They played maaadal (a Nepali drum-like instrument), and we all vibed and had dinner together.
That’s when we met another couple from Chitwan. What we learned from them was that they had been sent to the wrong route. Literally, this poor couple had hiked all the way from Kande, reached Forest Camp, and almost reached Kalimati before realising the mistake.
Obviously, they looked furious, but by the end of the day, we were all a team now. From three to eight. That was our Mardi Gang!
Chapter 5: Rest Camp to High Camp
I was up early. I couldn’t get proper sleep as there was only one blanket. Actually, there was another one on the other bed, but somehow I missed it (only realzed in the morning). I ended up sleeping in the cold, which gave me an irritable bowel the entire night.
Thankfully, I had my meds, and this was cured by the time we reached High Camp. You see, packing is very important, especially when you’re doing a winter trek in high-altitude regions.
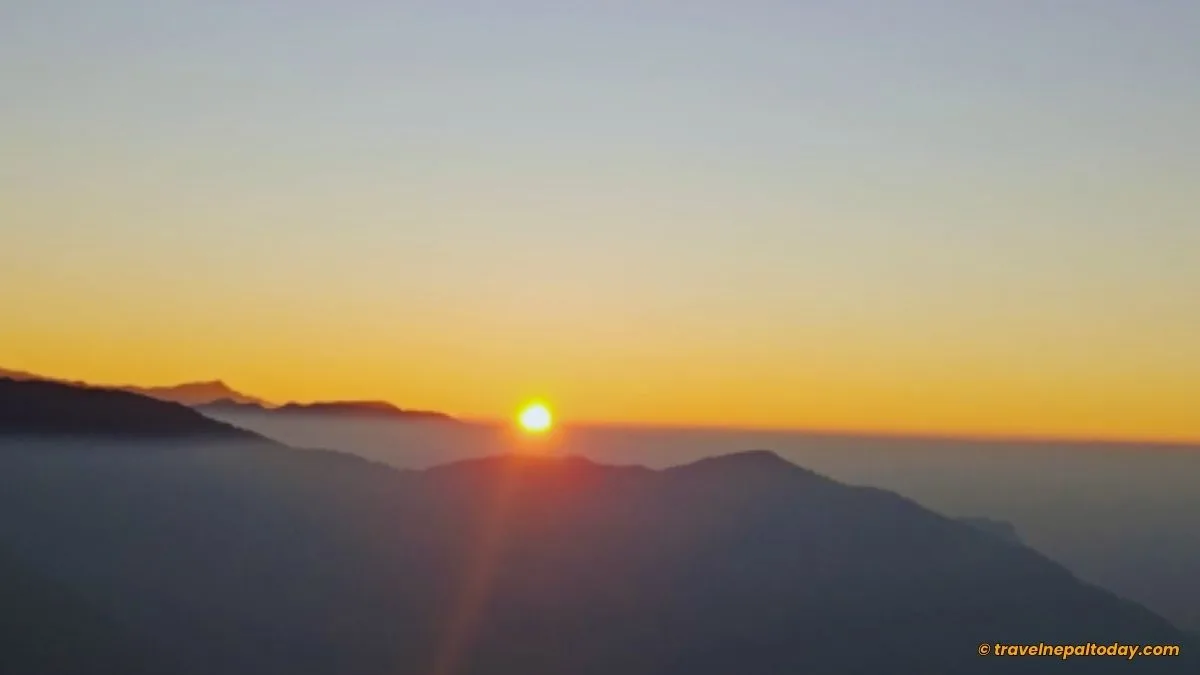
The morning was beautiful, with the sunrise right above the clouds. Having breakfast while viewing the magnificent Machhapuchhre peak was seriously the perfect start to the day.
First, we reached Kamkiku (2,793 m) and then Low Camp (2,970 m). The mountain view from here was spectacular, particularly the Fishtail mountain yet again. We had to stop here briefly for pictures before moving on.
Most of us had heard of Badal Danda (3,300 m) and the view of cloud inversion from there. From yesterday’s talk itself, we had planned to take pictures too. But it turns out, the clouds only form during early morning and before sunset.
While the others stayed here for lunch, our initial squad skipped it for the day and relied on light snacks only. Turning back time, we should have had some light lunch, even if not Dal Bhat. Those dried noodles were actually not enough for us. In fact, I don’t recommend hiking on an empty stomach as we did.
My friends’ energy was clearly drained. Later, we became even more slow compared to those who had their lunch and got ahead of us. In fact, I had to wait for nearly an hour at Upper Badal Danda as they were really slow.
Thankfully, our new friends reached High Camp (3,553 m) quickly and booked into a good lodge. We had heard of their service from the lower regions and were excited for the stay there. Was it worth it? Good, but not the best.
While they made sure we got the services right, they were a bit strict regarding warm water. Considering the altitude, I believe that’s fine. But the place was really crowded, with a big group of Spanish guests along with us.
We barely got a seat by the fireplace, which was only offering little warmth as it’s really difficult to light a fire at high altitude. Somehow, we all managed to squeeze in, had some chats with the Latina ladies, and were ready to sleep early.
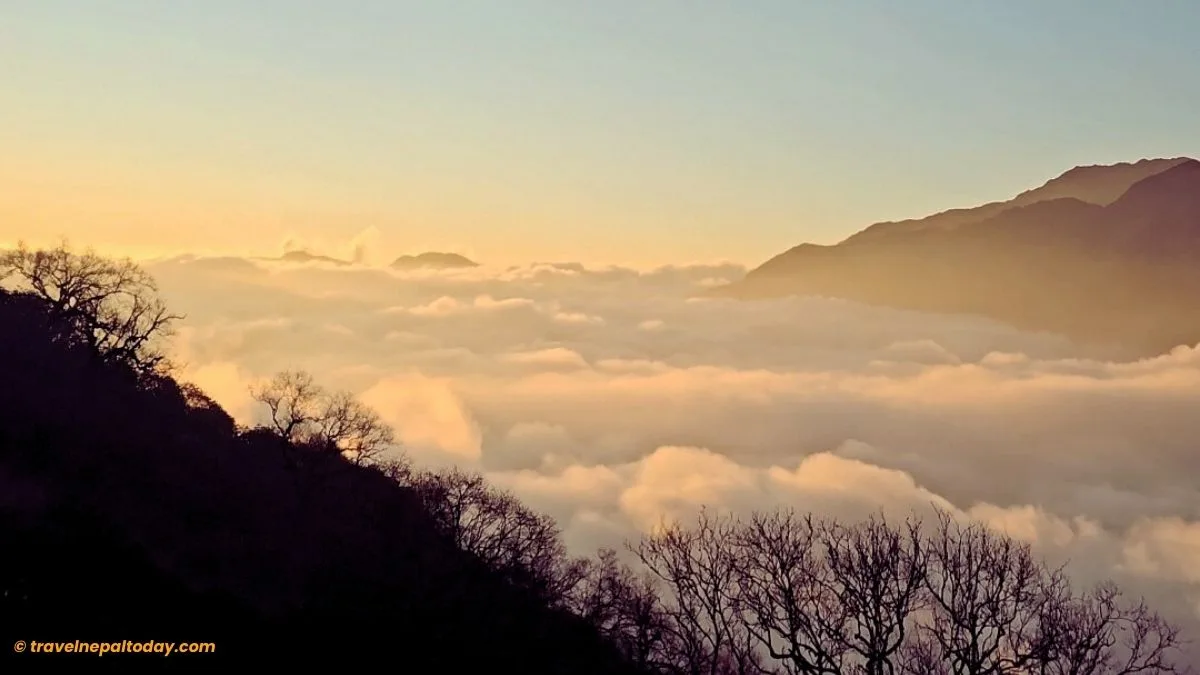
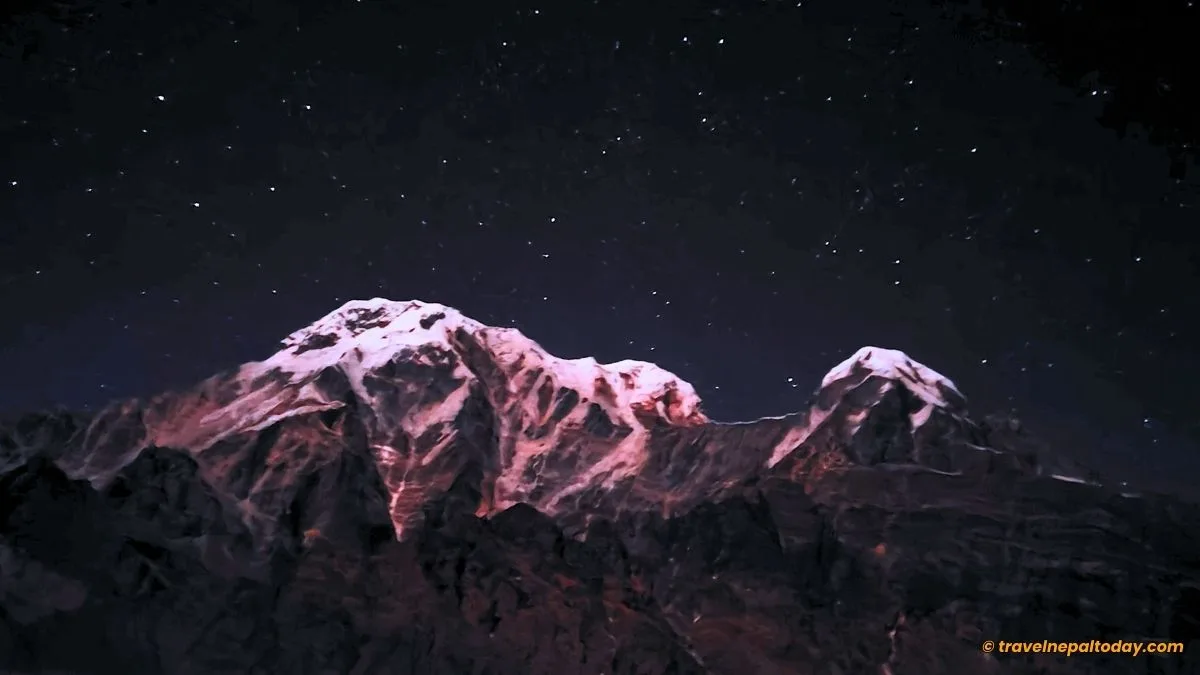
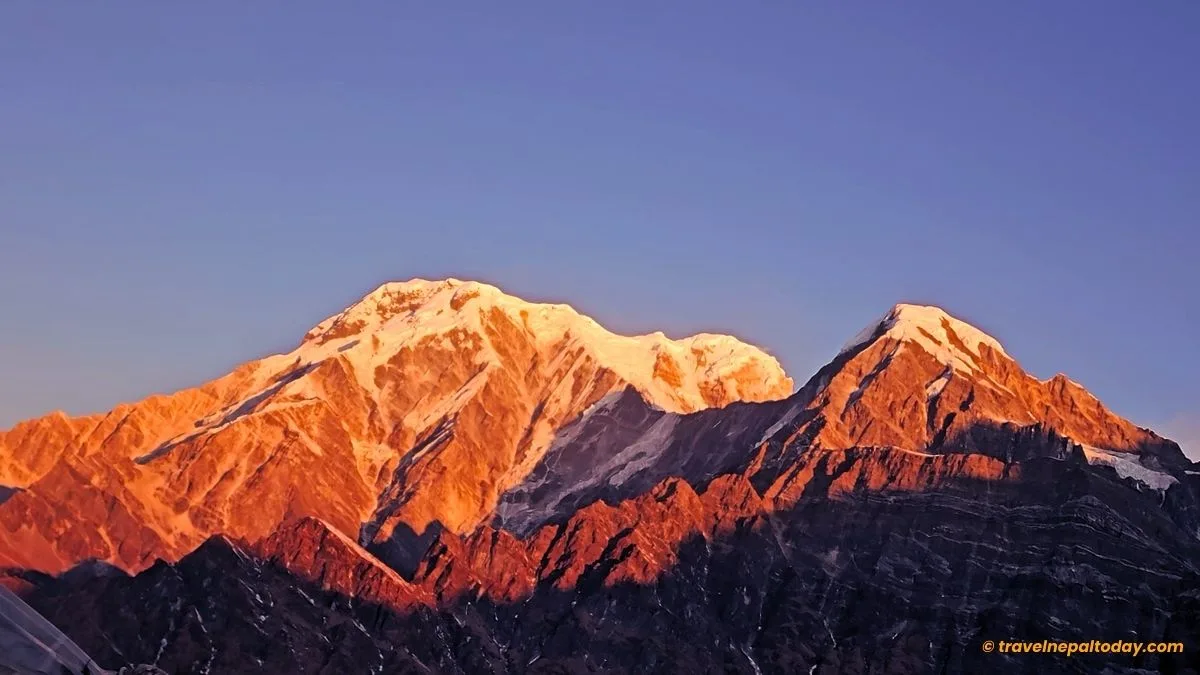
But there’s one more thing I didn’t mention: High Camp’s extraordinary clouds and mountain views in the evening. As the sun was setting, the mountains turned golden, we were sitting right above the clouds, and it was definitely one of the best moments of the entire trek.
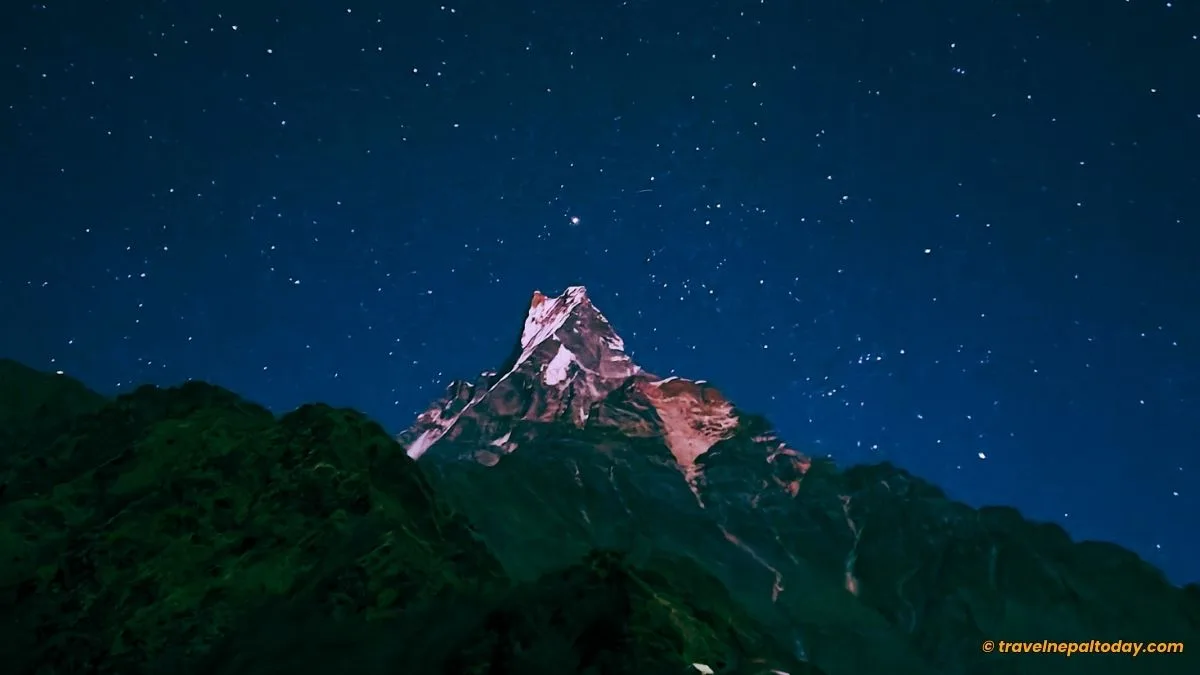
Even at night, the shooting stars and the glow of the white mountains made it perfect for night shots. I even posed to take some shots with Machhapuchhre and Annapurna South.
For the night, the five of us took one room and the three ladies took another. Thankfully, we were not in peak season, and even despite a group of Spanish trekkers, we were able to get plenty of blankets.
I placed one blanket under me and three over me. I made sure my mobile phone and power bank were under the blankets, too. Why? That December night was freezing cold, and batteries usually die quicker at such temperature.
The buckets of water had all turned to ice by midnight. Doing your morning duties was impossible, and another challenge was to wake up at 3 AM the next day for a sunrise hike to the viewpoint.
Chapter 6: That Early Morning Hike to Mardi Viewpoint
I barely got a proper sleep this day too. But I wasn’t feeling as cold as the previous night. I was all set and ready by 3 AM, but none of the others were ready to wake up. I insisted a lot and had to wait for an hour before we could finally start the hike.
The hotel owners were not up. That’s what I didn’t like. We needed hot or warm water, but we had to stick with cold. I even had to get inside the kitchen and fetch it myself.
Hydration is extremely important in high-altitude treks. So, when you’re trekking in the Himalayas, be sure to arrange things yourself.
But if you’re with a guide, the trek becomes super easy. That’s why, for foreign trekkers, I highly recommend going with at least a local guide.
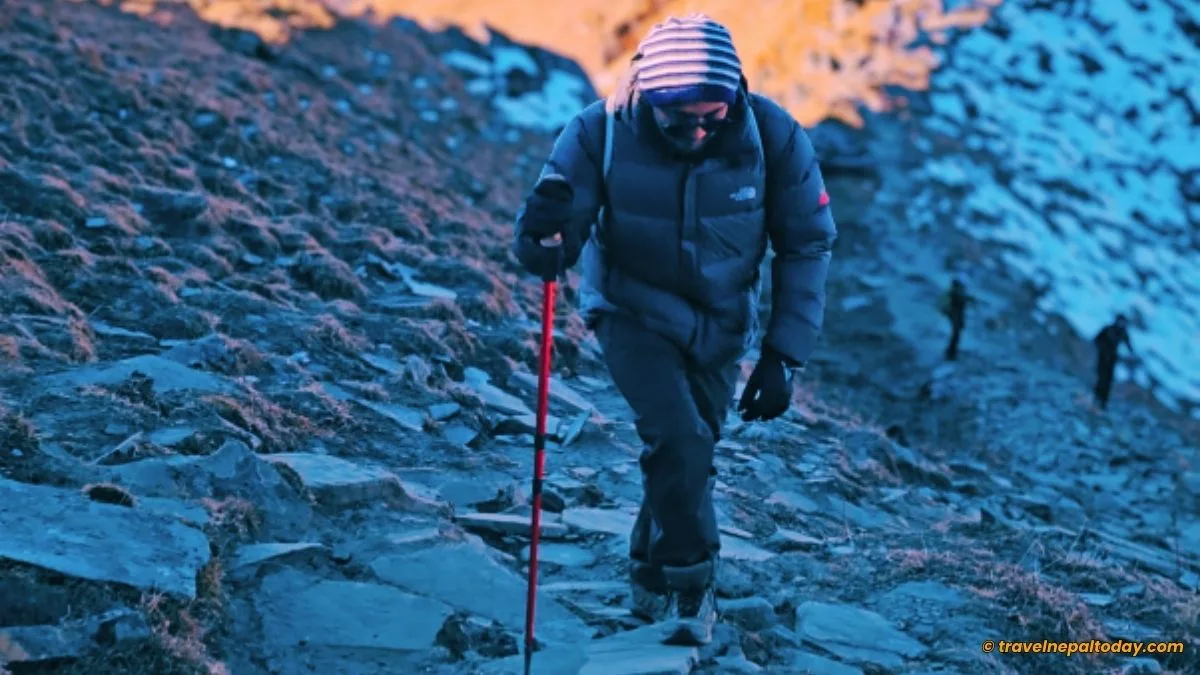
Coming back to my story, we started the hike at around 4:15 AM or so. Most of them were not sure if they would be heading to Base Camp, but I had my plans. While I stuck with the team for the first hour (because I had no torch or headlight), I decided to move a bit faster.
The route was completely uphill, but it was dark, and I was almost half asleep. Cold weather but the spectacular shooting star views made it all worth it. I was walking all alone now.
I even turned back to see other trekkers, and what I saw was a queue of lights. Even in the cold December, people choose Mardi trek, which is amazing!
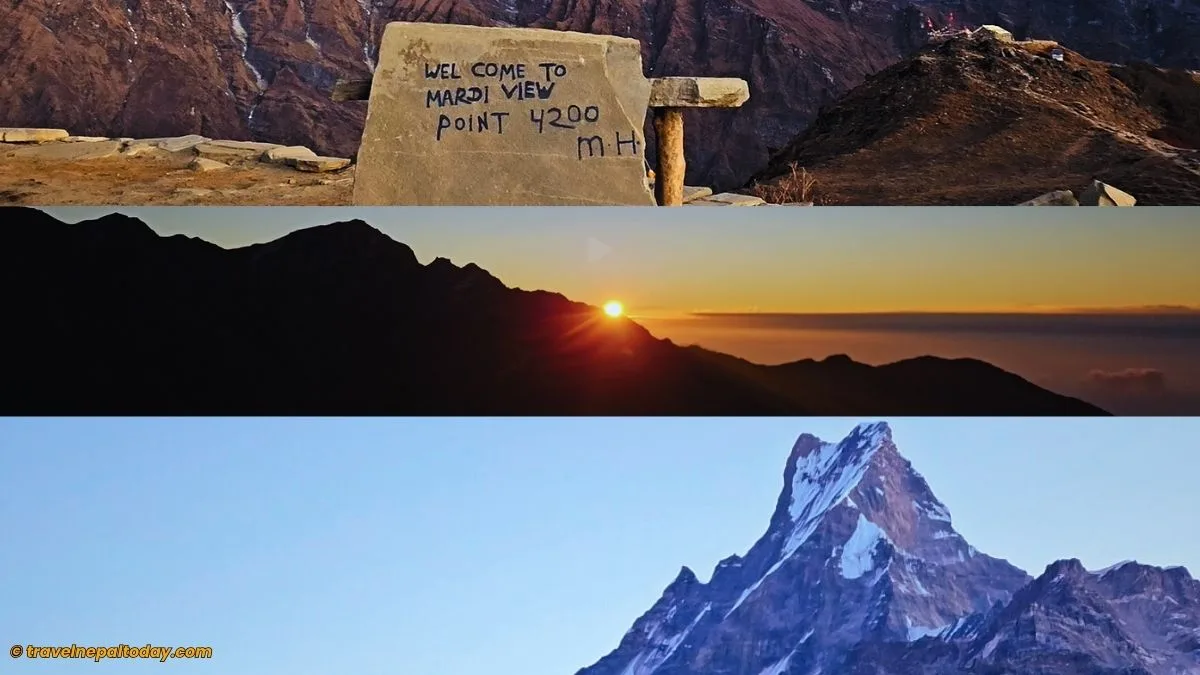
I didn’t realize I had passed Lower Viewpoint (3,981 m), and within 2 hours, I was already at Upper Viewpoint, aka Mardi Himal Viewpoint (4,200 m). It was still dark, but one teahouse was open…
A didi had arrived early in the morning to serve tea for the hikers. She was there lighting firewood at 4,200 m. My hands were freezing, and I didn’t hesitate to get the warmth. Looking at the dedication of this lady was really inspiring!
The cost for black tea was NPR 200. I didn’t hesitate to purchase a cup and tried it with a pack of biscuits I had carried in my sling bag while enjoying the sunrise. Not to forget that there was a dog too (I shared a few biscuits with it).
The tea was actually not for satisfying my taste buds at all. It was rather about respecting this lady’s hard work. I even made sure each of my friends drank a cup of tea there.
As the sun rose and the mountains turned golden, the sight made me wonder how beautiful my country, Nepal, really is. I was freezing while taking pictures and videos, but it was all worth it!
One more thing: going above 3,500 meters too quickly poses a serious risk of altitude sickness. Especially after 4,000 m, the oxygen level drops significantly.
Even in our case, one of the eight members wasn’t feeling well, so the other two of his friends had to take him down to High Camp (which was a great decision). Eventually, the two made their way to the viewpoint to share this news. They were quick, really!
From this small sample survey alone, we can get a rough idea. My stats say at least 12.5% of those doing the Mardi Himal Trek are prone to altitude sickness.
Also, from our initial squad, one decided not to head to Mardi Himal Base Camp. She was happy to be partway up to the Viewpoint and didn’t want to take the risk of a 2-hour extra hike. Honestly, she could have done it, and sometimes confidence is what you need.
Another stat? Well, roughly 75% of Mardi Himal trekkers can actually reach the Base Camp, while the remaining 25% fail due to altitude sickness or confidence issues. I mean, this is just a rough survey, but I hope you get the idea.
Chapter 7: Stretch From Mardi Viewpoint to Mardi Base Camp
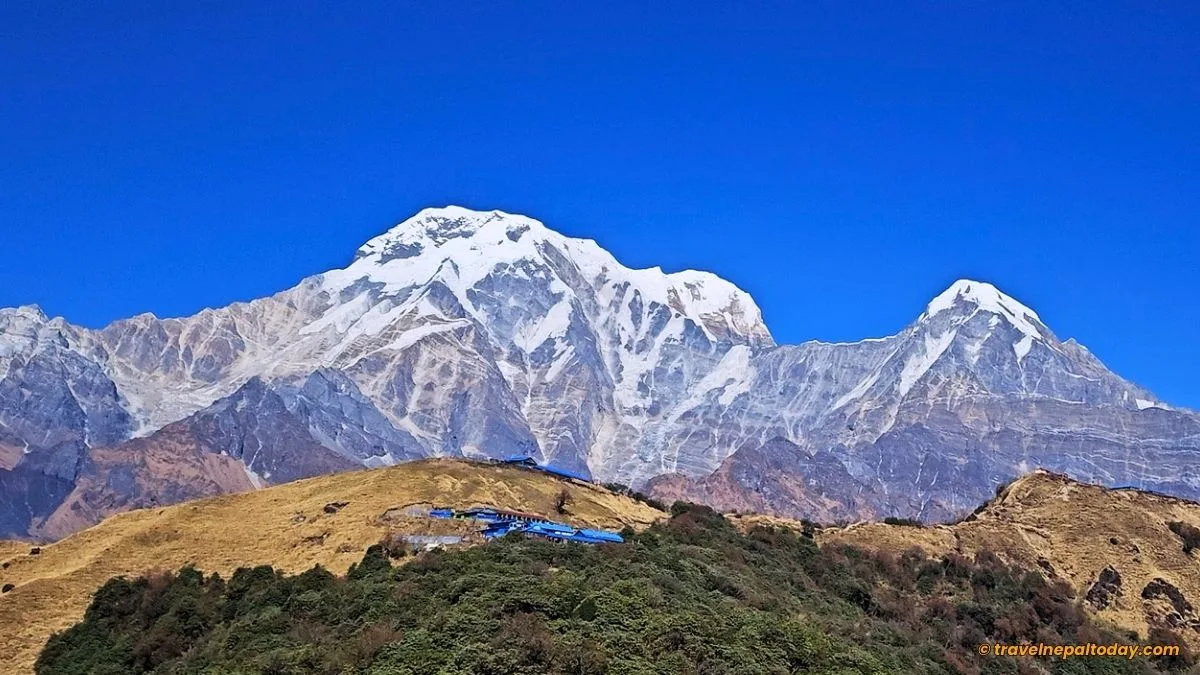
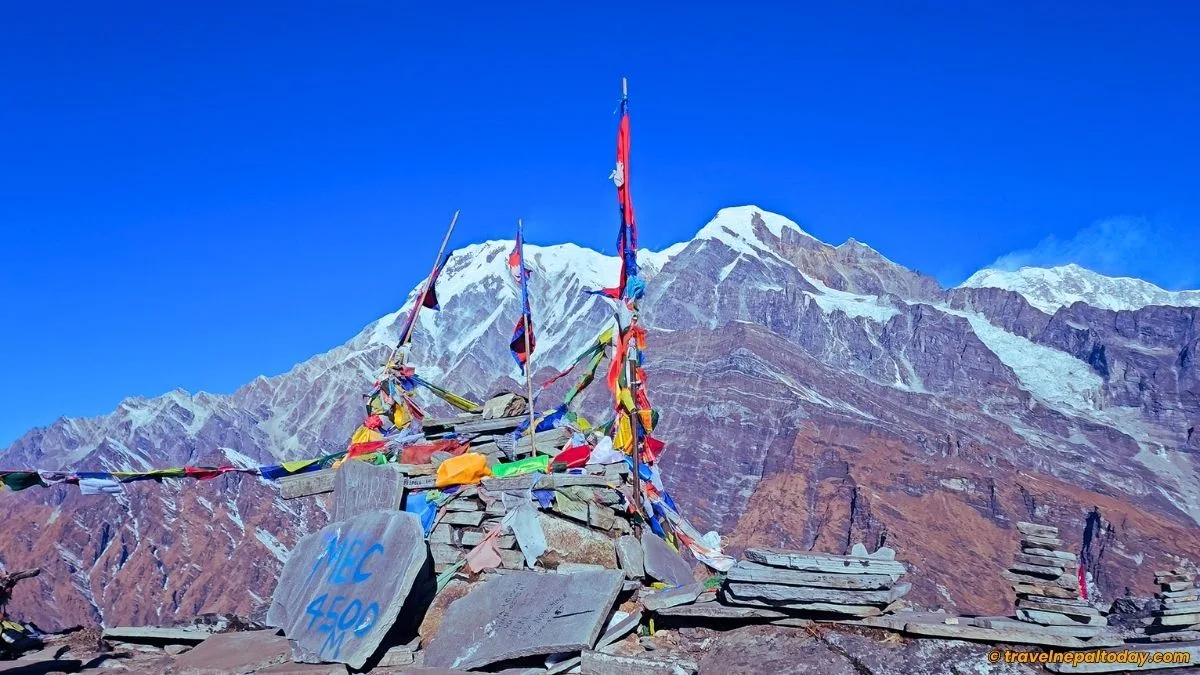
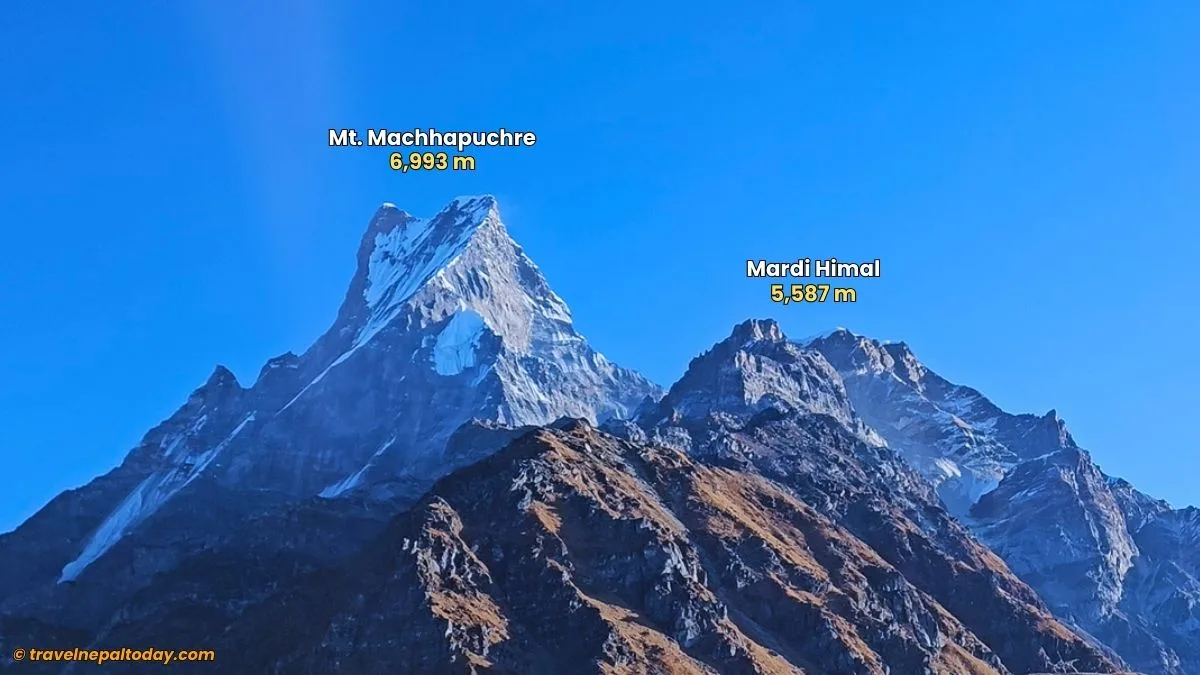
Those of us who were ready for Base Camp didn’t waste much time. We started the hike while enjoying the surrounding mountain views of Mardi Himal (5,587 m) and Machhapuchhre (6,993 m) right in front of us, with Annapurna South (7,219 m) andHiunchuli (6,441 m) on the side.
Even slightly far-sighted views of Khangsar Kang, Tarke Kang, Tare Kang, Asapurna, and Gangapurna looked prominent that day. You could actually pause anywhere, and the background would turn perfect.
As mentioned earlier, the stretch from Mardi Viewpoint to Mardi Base Camp should take about 2 hours (2 km). But thanks to that mountain energy, it took us only 1.5 hours.
The mountains appeared even more closer. Everyone was excited. One of my friends wore her traditional dress for photos in the mountains, and another dai went on to become topless.
Me? As a culer, I was all set with my jersey inside. I just had to open my jacket and give some poses. That was it. The Mardi Himal Trek was done. Now, it was time for the return!
My friends were in an absolute hurry, so we had to rush a bit on the downhill, although I highly despise this. My plan was to give more time at Base Camp and come down slowly, but sometimes, you just have to listen to the group.
Amusingly, we even made our new friends hike down on the same day. They must have been pissed off.
It’s actually better not trek all the way to Sidhing on the same day like we did. Instead, allocate an extra day.
I’ve talked about it more here on Travel Nepal Today’s 6-day, 7-day, and 8-day itineraries (or 4 days from Pokhara). That’s the best option for every trekker.
Chapter 8: Light Snow Made the Trip Perfect!
As per the new plan, we first hiked down to High Camp for a late breakfast. It was more like a brunch.
We packed our things, and just then, something magical happened. We were surprised by a light snowfall. Everyone got excited, and we posed for a group picture.
Some of my friends experienced their first snowfall ever. All of us were happy and almost forgot that we had to reach Sidhing the same day.
Slowly, the snow started to look like it could get heavier. We were lucky, but also unlucky at the same time.
And remember that snowless Machhapuchhre I talked about earlier? Well, it finally got covered in snow, and the view became exactly what it should be!
Even the trail had snow stains, and I wanted to take a video. This was a time when I didn’t use a tripod, so I just placed my Z Flip phone upside down. Well, it dropped, and I almost broke it. Ever since then, I never go on trips without my mobile tripod (truly blessed to use it).
Chapter 9: Crazy Downhill to Sidhing via Low Camp
It was the same route at first. From High Camp, we came down to Badal Danda and then followed the trail to Low Camp. After that came a different route. A straight downhill.
Some of my friends were already prepared with their knee compression sleeves. They knew it was time. Even my knees got hurt this time, because it was truly a never-ending downhill.
We walked for almost 21 km this day, which is definitely too much. We could have stayed somewhere in between and made this trek more relaxing, but my friends had other plans, and I had to comply.
If I ever get the chance to visit the Mardi Himal route again, I would actually spend a little more time at Badal Danda to get those cloud views I wanted to see. Still, my wish was somewhat fulfilled, as the view from High Camp was incredibly beautiful.
Our team was mostly together, except for three guys who were a bit slow due to extreme knee pain. You see, this is why you should take it slow. You can’t put too much stress on your knees, right?
We were all rushing towards Takaichi (2,285 m) and then to Ratencho (2,092 m) before finally reaching Sidhing (1,751 m). The exact place from where shared jeeps are available is called Bhimjung (1,935 m), and it took a really long time to reach there.
We had only light snacks (chatpate) at Badal Danda, and all of us were hungry. At one point, it felt like we were going to stay in Sidhing itself. But since a jeep was ready to go, we had to pay a little extra, considering it was already dark.
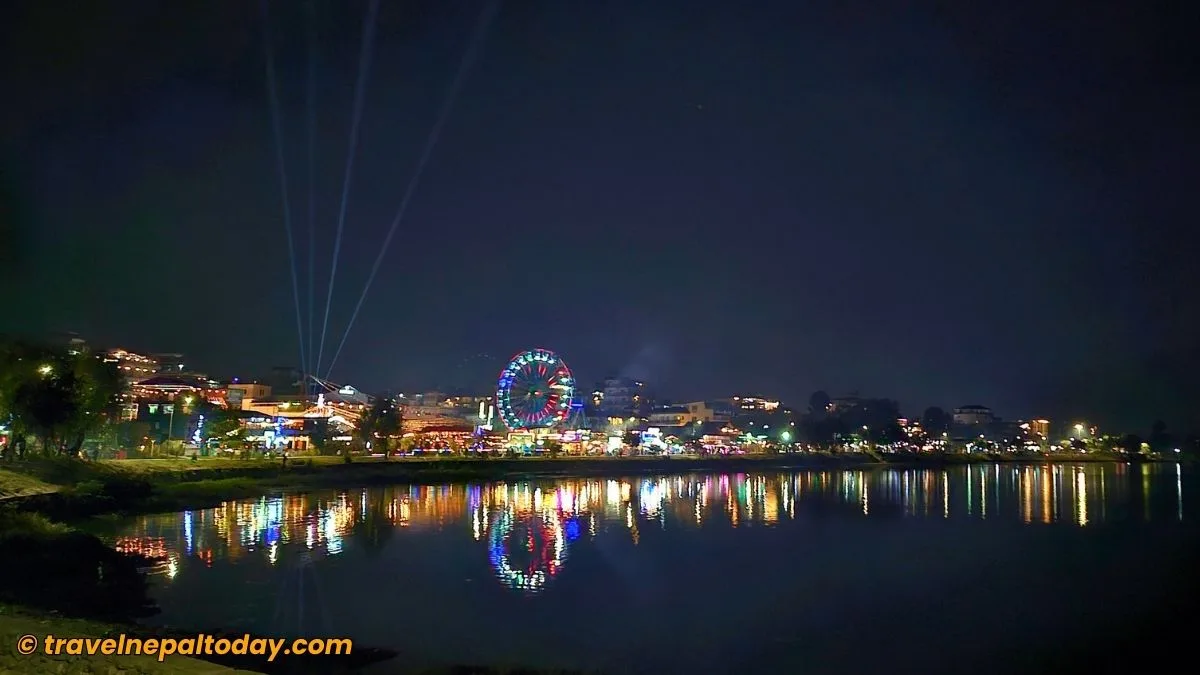
The price was fixed, although our team wanted to bargain. There was a slight miscommunication, and we had almost lost this option. But the good news was that we were able to reach Lakeside, Pokhara today!
Chapter 10: Lakeside Stay & Kathmandu Return
After that 2.5-hour drive, my friends from Pokhara decided to go home. The remaining six of us headed straight to a restaurant. We enjoyed our long-awaited meal even before finalizing our stay for the night.
The three guys and I decided to stay together. My trip, although solo, didn’t feel like one for those three days. After checking in, we went out to Lakeside to celebrate with a few beers.
I was there celebrating an unexpected trekking journey with four strangers whom I had never met before. Travelling alone really brings out a different version of you, and that was my story.
The next day, I woke up, waved goodbye to my three new friends, and hopped on a passenger van from Prithvi Chowk back to Kathmandu.
Best Time For 5-Day Mardi Himal Trek
The problem with my 5-day Mardi Himal Trek itinerary is that it was a bit rushed. It’s actually best to stay at Low Camp and hike to Sidhing the next day. Then, without spending a night in Lakeside, you can return directly to Kathmandu, completing the trip in 5 days as well.
That’s the reason I’m indicating this 5-day trek’s difficulty as intermediate. Otherwise, the actual difficulty level of the Mardi Himal Trek is considered “Moderate,” as discussed in the linked guide.
But if you are seriously willing to complete the Mardi Himal Trek in 3 days from Pokhara or 5 days from Kathmandu, be sure to choose a warmer season, and not like the December timing we had.
That’s because the daylight hours are longer, and you don’t have to take the risk of hiking in the late evening.
Also, it’s less cold compared to the winter time (from November to February). And just to let you know: our human body handles altitude better in warmer weather.
Only opt for this challenge when the weather is ideal, temperature hasn’t droped too much, and trail conditions are good. Avoid the prime monsoon and winter.
Packing List For Your 5-Day Mardi Adventure
The packing list for any trek depends on multiple factors, such as the number of days, the season, and the teahouse conditions. You should pack things that make you comfortable, because you’ll be carrying that backpack and relying on yourself throughout the trek.
I’m going to share my own packing list and also suggest some recommended products, based on good reviews. These items should be enough for your 5-day Mardi Himal Trek in any season.
5-Day Mardi Himal Trek Cost & Packages
The overall Mardi Himal trek cost or budget differs for Nepalese and international tourists. Nepalese can expect to complete this 5-day trek in NPR 13,000 to 15,000 budget, which is quite ideal.
Here’s a general idea on how it should go on a per-person basis (remember this is just an idea, the cost may be lower or higher, that’s why I’m suggesting 15k):
- Vehicle Expenses: NPR 3,000 to 4,500
- Rest Camp Package: NPR 1,500 to 1,700
- High Camp Package: NPR 1,500 to 1,800
- Snacks and Extras: NPR 1,000 to 1,500
- Pokhara Stay (2 nights) : Depends on your spending (mine was around NPR 3000 to 3500; you can spend less here to complete the trek in budget)
For foreign trekkers, the prices vary depending on whether you’re trekking independently, with a freelance guide, or with a travel agency.
The best option is definitely choosing a registered trekking agency because you’ll be safer and everything else will be handled for you!
Packages for the Mardi Himal Trek usually cost USD 390 to USD 1000, depending on how reliable the agency is and the level of luxury you prefer. Generally, this price covers your vehicle expenses, BLD during the trek, guide fees, porter fees, etc. Overall, it’s a good deal, but I also suggest tipping the guides and porters.
But which agency should you choose? Well, our TNT team is working on reviewing travel agencies through various means, and we’ll soon update it here on the site with the best ones.
But for the time being, you can fill up the form below to book your Mardi Trek, and we’ll get back to you with the best possible option:
Remember: Travel Nepal Today is not a trekking or travel agency. Our job on the internet is to provide you with actual and factual information about Nepal and also help you out in every possible way, so you get to explore the beauty of this country.
Final Words
Did you read the entire blog? I mean, this was a long one, so thank you!
I really hope you enjoyed my story. I know it wasn’t an extraordinary one, but I hope I was able to give you a clear visualization of how Mardi trek actually goes.
You are next to do this trek, and I believe that the multiple itineraries I’ve shared should be more than enough. But if you still have any confusion, feel free to jot down your queries in the comments below.
Happy travelling to Kaski!